Skip to content
DisclaimerTerms Of UseGDPR PolicyCookie Policy

mealmaple

  • Home
  • Drinks
  • Appetizers
  • Dinner
  • Dessert
  • About
  • Contact
  • Privacy Policy
DisclaimerTerms Of UseGDPR PolicyCookie Policy

Evelyn

- 1 cup jasmine rice - 1 can (14 oz) coconut milk - 1/2 cup water - Zest of 1 lime - Juice of 1 lime - 1 tablespoon sugar - 1/2 teaspoon salt - Fresh cilantro, chopped (for garnish) You can switch the jasmine rice for basmati or brown rice. Both will work well. If you want to skip sugar, use honey or agave instead. Each option adds its own flavor twist. One serving of coconut lime rice has about 250 calories. It contains 10 grams of fat, 35 grams of carbs, and 4 grams of protein. This dish is rich in flavor and can fit into many diets. For the full experience of this dish, check out the Full Recipe. - Rinsing the rice properly Start by rinsing the jasmine rice under cold water. This step removes excess starch. Keep rinsing until the water runs clear. This keeps your rice fluffy and light. - Combining ingredients in a saucepan Next, in a medium saucepan, mix the rinsed rice with coconut milk, water, lime zest, sugar, and salt. Stir everything together well. This blend of flavors will make your rice tasty and aromatic. - Boiling and simmering the mixture Bring the saucepan to a gentle boil over medium heat. Once it boils, turn the heat down low. Cover the saucepan with a lid. This helps the rice cook evenly without losing steam. - Letting the rice steam Allow the rice to simmer for about 15 minutes. Do not lift the lid during this time. The rice will absorb all the liquid and become tender. - Fluffing the rice After cooking, remove the saucepan from the heat. Let it sit, covered, for 5 minutes. Then, take a fork and fluff the rice gently. This makes it light and airy. - Adding fresh lime juice and garnishing Stir in the fresh lime juice to boost flavor. Adjust the seasoning if needed. Finally, transfer the coconut lime rice to a serving dish. Top with fresh cilantro for a vibrant touch. Enjoy your flavorful side dish! For the full recipe, check out the Tropical Coconut Lime Rice section! To achieve fluffy rice, start by rinsing the rice. This step removes excess starch. Starch makes the rice stick together. Rinse until the water runs clear. This helps your rice stay light and fluffy. Do not lift the lid while the rice cooks. Lifting the lid lets steam escape. Steam is key to cooking rice properly. The rice needs this steam to soften and absorb all the flavors. You can add spices for extra flavor. Cardamom and ginger work great in this dish. A pinch can change the taste and make it special. Try different spices based on your taste. Using fresh lime is best. Fresh lime juice gives a bright, zesty flavor. Bottled lime juice lacks the same freshness. Use fresh lime juice to enhance the overall taste of your dish. Coconut lime rice pairs well with grilled meats or seafood. The creamy coconut flavor complements the grill's smoky taste. Think of pairing it with shrimp, chicken, or fish. Incorporate this rice into a tropical-themed meal. Add fresh fruit, like mango or pineapple. A colorful salad can also brighten your table. You can create a fun and vibrant meal that tastes amazing. For the full recipe, check out the Tropical Coconut Lime Rice section. {{image_2}} You can change the taste of coconut lime rice easily. For a richer texture, add unsweetened coconut flakes. This gives it a nice crunch. You can also place fresh lime slices on top for a bright look. For a fresh twist, try adding herbs. Mint or basil can give your rice a unique flavor. Chop the herbs finely and mix them in after cooking. This adds a fresh note that is both fun and tasty. Coconut lime rice is already vegan-friendly. Make sure you use dairy-free coconut milk. Check the label to avoid any hidden dairy. Pair this dish with plant-based proteins. Great options are chickpeas or black beans. They add protein and make the meal hearty. You could also serve it with grilled veggies for a colorful plate. Take your coconut lime rice on a global journey! For a Caribbean vibe, add black beans and diced mango. These flavors blend beautifully and create a tropical feast. If you want an Asian twist, add sesame oil and soy sauce. This gives the rice a nice umami taste. You can also mix in some chopped green onions for crunch. Each variation brings a new flavor to your meal. To store your delicious coconut lime rice, use an airtight container. Glass or plastic containers work well. Make sure the rice cools down before sealing. This helps keep moisture in check. You can store it in the fridge for up to four days. If you want to keep it longer, freeze it. Coconut lime rice lasts for about three months in the freezer. When it’s time to eat your leftovers, you can use a microwave or stovetop. For the microwave, place the rice in a bowl. Add a splash of water to keep it moist. Cover the bowl with a microwave-safe lid. Heat it for one to two minutes. For stovetop, add the rice to a pan with a little water. Heat it on low, stirring often until warm. This helps restore the rice’s texture and flavor. Get creative with your leftover coconut lime rice! You can mix it into a salad for a burst of flavor and texture. Try adding fresh veggies, beans, or a protein. It also makes a great filling for wraps. Just spread it on a tortilla, add veggies, and roll it up. You can enjoy it as a light lunch or snack. Check out the Full Recipe for more ways to use this tasty dish! Coconut lime rice is a delightful side dish. It blends jasmine rice with creamy coconut milk and zesty lime. This dish has a sweet and tangy flavor. The coconut milk makes the rice rich and creamy, while the lime adds brightness. You cook the rice by simmering it in coconut milk and water. The key is to let it absorb all the flavors. Yes, you can prepare coconut lime rice in advance. Just follow the cooking steps and let it cool. Store it in an airtight container in the fridge. When you're ready to use it, simply reheat it. You might want to add a splash of water to keep it moist. This makes it easy for busy days or gatherings. You can modify the sweetness easily. If you prefer less sugar, use less than the recipe calls for. You could also try alternative sweeteners like honey or agave. This can help you find the right balance for your taste. Just make small adjustments and taste as you go. Yes, this recipe is gluten-free! Jasmine rice does not contain gluten, making it a safe choice. You can enjoy this dish if you're following a gluten-free diet. It's a great option for everyone at the table. Plus, the flavors are so good that no one will miss the gluten! Coconut Lime Rice is a fun dish that's easy to make. We covered the key ingredients, including jasmine rice and coconut milk. You learned how to cook it to be fluffy and flavorful. Don’t forget the tips for adding spices or using fresh lime. This dish can fit into many meals, and you can store leftovers for later use. Try new variations and make it your own! Enjoy bringing the tastes of the tropics into your kitchen.

Coconut Lime Rice Flavorful Side Dish Recipe Guide

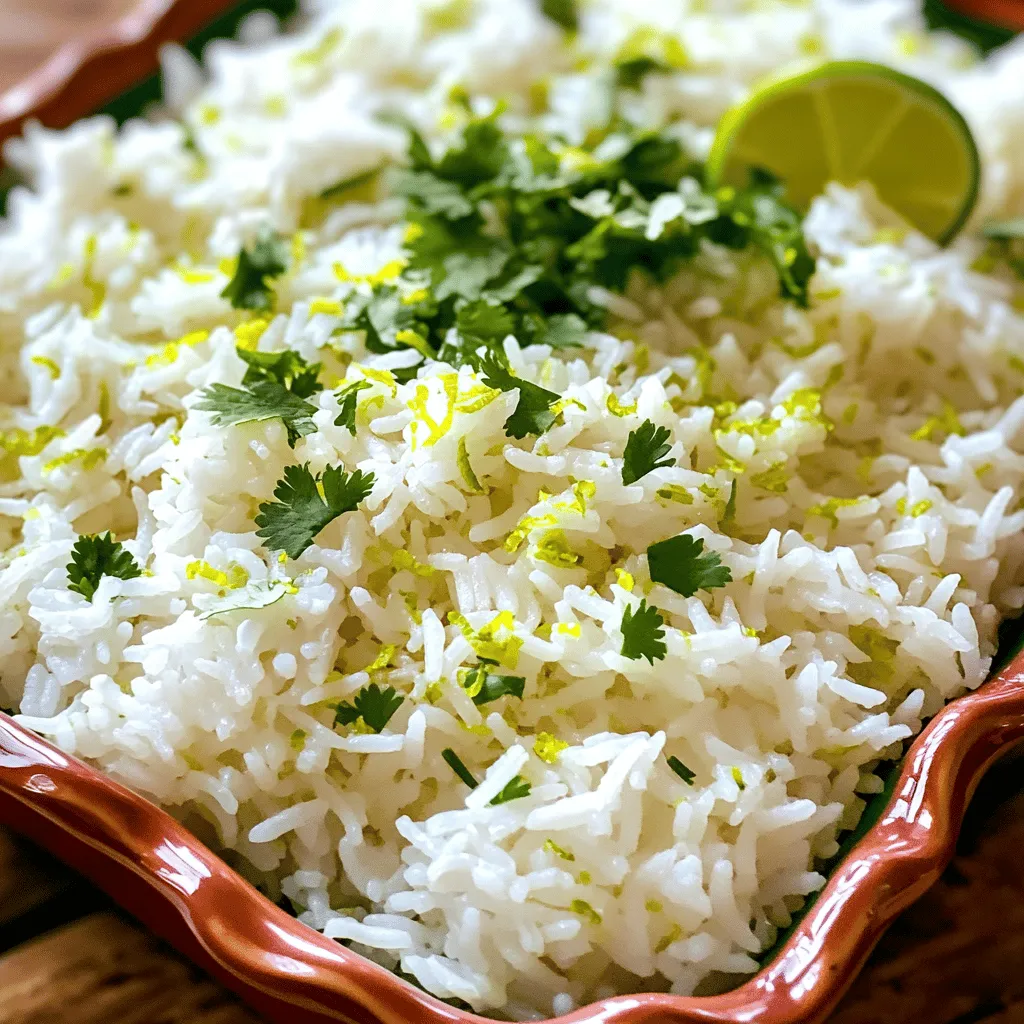
Looking for a side dish to impress? Coconut Lime Rice is a game-changer! It combines the creamy richness of coconut

- 4 large russet potatoes, peeled and thinly sliced - 2 cups shredded sharp cheddar cheese - 1 cup sour cream - 1 cup milk - 1 small onion, finely diced - 2 cloves garlic, minced - 2 tablespoons butter - 1 teaspoon dried thyme - Salt and pepper to taste - 1 cup panko breadcrumbs - 2 tablespoons fresh parsley, chopped (for garnish) Each ingredient plays a vital role in making this dish tasty. The russet potatoes form the base. They provide a creamy texture when cooked. Sharp cheddar cheese adds a rich flavor. It gives that classic cheesy goodness we all love. Sour cream makes the casserole creamy and tangy. It balances the richness of the cheese. Milk helps to blend the ingredients smoothly. Onion and garlic add depth and aroma. The thyme brings a hint of earthiness. Panko breadcrumbs create a crispy top layer, making every bite delightful. Fresh parsley adds a pop of color and freshness. You can change some ingredients if you need to. For a lighter option, use Greek yogurt instead of sour cream. If you like a different cheese, try mozzarella or gouda. You can swap russet potatoes for Yukon Gold for a creamier texture. Instead of panko, use crushed crackers or regular breadcrumbs. If you want a vegan option, use plant-based cheese and sour cream. These changes still keep the flavor great while fitting your needs. Start by preheating your oven to 375°F (190°C). This step sets the stage for a perfect bake. Next, peel and thinly slice 4 large russet potatoes. Aim for even slices to ensure they cook well. Dice 1 small onion finely and mince 2 cloves of garlic. These add great flavor. In a large skillet, melt 2 tablespoons of butter over medium heat. Add the diced onion and sauté for about 3-4 minutes. Wait until it's soft and clear. Then, add the minced garlic and cook for just 1 more minute. The aim is to release its rich aroma. In a mixing bowl, combine 1 cup of sour cream, 1 cup of milk, 1 teaspoon of dried thyme, salt, and pepper. Mix well. Then, stir in half of the 2 cups of shredded sharp cheddar cheese. Finally, add the sautéed onion and garlic mixture to this bowl. Grease a 9x13-inch baking dish to prevent sticking. Layer half of your sliced potatoes evenly on the bottom. Pour half of the cheese mixture over the potatoes and spread it gently. Repeat this process with the remaining potatoes and cheese mixture. Now, top the casserole with the rest of the shredded cheddar cheese. This gives that gooey, cheesy goodness. Sprinkle 1 cup of panko breadcrumbs evenly over the top for a nice crunch. Cover the dish with aluminum foil and bake in your preheated oven for 40 minutes. After 40 minutes, carefully remove the foil. Bake for an extra 15-20 minutes. You want the top to be golden brown, and the potatoes should be tender. Check by piercing with a fork. Once baked, take the casserole out of the oven and let it cool for 5-10 minutes. This helps the flavors settle. For a nice touch, garnish with chopped fresh parsley before serving. To check if your casserole is done, insert a fork into the potatoes. If it goes in easily, your dish is ready. The top should be golden brown. If it’s not brown enough, you can leave it in the oven for a few more minutes without the foil. Remember, it’s important to let your casserole cool a bit before digging in. This makes serving easier. If you're curious about the full recipe, you can find it [here]. To make the best cheesy potato casserole, layer the potatoes evenly. This helps them cook well. Use a mix of textures by adding creamy cheese and crunchy breadcrumbs. Bake it covered first to keep moisture in, then uncover for a crispy top. You want that golden brown look! For an extra kick, sprinkle some paprika on top before baking. One common mistake is slicing potatoes too thick. Thin slices cook evenly and get tender. Another error is skipping the sauté step for onions and garlic. This adds great flavor! Don't forget to season each layer well. Lastly, avoid overbaking; check for doneness with a fork to see if the potatoes are soft. You can prepare this dish a day ahead. Layer everything in your baking dish, then cover it with foil. Store it in the fridge overnight. When you’re ready to bake, just add a few extra minutes to the cooking time. This allows the flavors to meld together nicely. For a quick meal, consider freezing it. Just remember to thaw it overnight before baking. Check the [Full Recipe] for all the details! {{image_2}} You can make a loaded cheesy potato casserole for extra flavor. Start by adding cooked bacon bits or crumbled sausage. These meats give a nice crunch and a savory taste. You can also mix in some green onions for a fresh bite. If you love spice, add jalapeños or your favorite hot sauce. These add a bit of heat and fun. The more toppings you add, the more flavors you can explore! If you want a vegetarian version, skip the meat but keep the cheese. You can use extra veggies like broccoli or bell peppers. For a vegan option, replace cheese with a dairy-free version. Use cashew cream as a substitute for sour cream and almond milk instead of regular milk. You can still enjoy all the creamy goodness without animal products. This way, everyone can enjoy the dish! Cheese is key to making this casserole rich and creamy. While cheddar is a classic choice, you can try others for a twist. Monterey Jack adds a mild flavor and melts well. Gouda gives a smoky touch that many love. For a sharp bite, consider using blue cheese or feta. Mixing cheeses can create a unique flavor profile. Just remember to balance it so one cheese does not overpower the others. For the complete recipe, check out the Full Recipe section. To store your leftover casserole, let it cool first. Cover it tightly with plastic wrap or foil. You can also use an airtight container. Proper storage keeps it fresh for up to four days in the fridge. Ensure it cools completely before sealing. When you're ready to enjoy your cheesy potato casserole again, preheat your oven to 350°F (175°C). Place the casserole in a baking dish if it's not in one. Cover it with foil to keep moisture in. Heat for about 20-30 minutes or until it's hot throughout. You can also reheat in the microwave. Use a microwave-safe dish and heat in one-minute intervals, stirring in between. If you want to freeze your casserole, let it cool completely first. Use a freezer-safe container or wrap it tightly in plastic wrap and foil. Label it with the date. It can last up to three months in the freezer. When you're ready to eat, thaw it in the fridge overnight before reheating. Enjoy your meal any time you crave it! For the full recipe, check the recipe section above. Cheesy potato casserole lasts about 3 to 5 days in the fridge. Store it in an airtight container. Make sure it cools down to room temperature before sealing. This keeps it fresh and tasty for later meals. Yes, you can make cheesy potato casserole in advance. Prepare it a day or two before serving. Just follow the steps in the Full Recipe. Store it in the fridge before baking. You can also freeze it for up to three months. Just thaw it overnight in the fridge before baking. Cheesy potato casserole pairs well with many dishes. Try serving it with a simple green salad for freshness. Grilled chicken or roasted vegetables are great choices too. You can also serve it alongside baked ham or meatloaf for a hearty meal. This post covered how to make a delicious cheesy potato casserole. You learned about key ingredients and steps in detail. I shared tips to perfect your dish and avoid common mistakes. You also discovered fun variations and storage tips. Enjoy making this recipe for your next meal. It’s easy to adapt and share with friends and family. Have fun experimenting with your own touches! Happy cooking!

Cheesy Potato Casserole Flavorful Comfort Food Dish

Looking for the ultimate comfort food? Cheesy Potato Casserole is the answer! This dish is creamy, cheesy, and packed with

To make a delightful spiced apple cider, you need fresh and simple ingredients. Here’s what you’ll need: - 8 cups apple cider - 1 orange, thinly sliced - 2 cinnamon sticks - 4 whole cloves - 4 whole allspice berries - 1 star anise - 1 tablespoon fresh ginger, thinly sliced - 1/4 cup brown sugar (adjust to taste) - Optional: whipped cream for serving Each ingredient plays a key role in creating rich flavors. The apple cider is the base, providing sweetness and warmth. The orange adds a bright, zesty note. Cinnamon, cloves, allspice, and star anise contribute aromatic depth. Fresh ginger gives the drink a little kick, while brown sugar balances the spices. If you want a creamy touch, add whipped cream on top when serving. For the full recipe, check the instructions section. Enjoy crafting this cozy drink that warms your soul! To start, gather all your ingredients and tools. You will need: - 8 cups apple cider - 1 orange, thinly sliced - 2 cinnamon sticks - 4 whole cloves - 4 whole allspice berries - 1 star anise - 1 tablespoon fresh ginger, thinly sliced - 1/4 cup brown sugar (adjust to taste) - Optional: whipped cream for serving Next, prepare your pot and measuring tools. A large pot works best for this recipe. Pour the apple cider into the pot. Heat it on medium until it simmers gently. This step is key to releasing the fruit's flavors. Now, add the orange slices, cinnamon sticks, cloves, allspice berries, star anise, and fresh ginger to the pot. Each spice adds depth to the cider. Stir in the brown sugar, making sure it mixes well. Reduce the heat to low. Let the cider simmer for 20-30 minutes. This time allows the spices to infuse. The longer it simmers, the richer the flavor becomes. Once the cider is ready, strain it through a fine mesh sieve. This will remove the spices and orange slices if you prefer. Serve the warm spiced apple cider in mugs. For a special touch, add a dollop of whipped cream on top. This makes the drink feel extra cozy and festive. Enjoy your delicious creation! To make spiced apple cider taste its best, use fresh, organic ingredients. Fresh apples and spices give strong flavors. If you want to adjust the sweetness, add brown sugar bit by bit. Taste as you go. This way, you can find the perfect balance that suits you. You can add more spices to boost the aroma. Consider using nutmeg, cardamom, or even a splash of vanilla. Each spice adds a unique twist. Simmering the cider is key for flavor. Let it cook slowly to allow all the spices to blend well. The longer you simmer, the richer the taste. For a fancy touch, garnish with whipped cream on top. Sprinkle some cinnamon or nutmeg for extra flair. Serve your warm spiced apple cider in clear glass mugs. They show off the beautiful colors and warmth of the drink. Enjoy the cozy vibes with each sip. For the full recipe, check the details above. {{image_2}} You can easily make spiced apple cider kid-friendly. Just leave out any alcohol. The warm spices still make it special. Use apple juice instead of cider for a sweeter taste. Some kids enjoy a splash of cranberry juice for extra flavor. For sweetness, you can swap brown sugar with maple syrup or honey. Both will give a nice touch. For those who want something stronger, try adding spirits. A splash of rum or bourbon adds warmth. You can also use brandy for a rich flavor. Mix it in after you heat the cider. This way, the alcohol warms up without boiling off. Pair these drinks with snacks like spiced nuts or cheese. They complement the cider well. Change up the spices for fall or winter. Add nutmeg or cardamom for a cozy twist. You might even toss in some pumpkin spice for a festive feel. During the holidays, think about adding dried fruit. Dried cranberries or raisins can enhance the taste. These little changes make each season special. To keep leftover spiced apple cider fresh, store it in the fridge. Use an airtight container. This helps avoid any unwanted flavors. If you have a lot left, consider freezing the cider. Use freezer-safe bags or containers. This way, you can enjoy it later without losing taste. When you are ready to enjoy your cider again, reheating is easy. Pour the cider into a pot and warm it on low heat. Stir often to prevent burning. You can also use a microwave. Heat it in short bursts, stirring in between. This keeps the flavors intact. Don't let it boil, as that can change the taste. Refrigerated spiced apple cider lasts about a week. If frozen, it can stay good for up to three months. Always check for signs of spoilage. If it smells off or looks cloudy, it’s time to toss it. Fresh cider should smell sweet and spicy, just like when you made it. What is spiced apple cider? Spiced apple cider is a warm drink made from fresh apple cider and spices. It has a sweet and spicy flavor. You can enjoy it during fall or winter for a cozy feel. The spices typically include cinnamon, cloves, and ginger. This drink warms you up and fills your home with a lovely aroma. Can I make spiced apple cider in a slow cooker? Yes, you can make spiced apple cider in a slow cooker. Just add all your ingredients to the pot. Set the slow cooker to low for about 4 hours. This method allows the flavors to blend well over time. It’s a great choice for parties or gatherings. You can keep your cider warm and ready to serve. What are the health benefits of spiced apple cider? Spiced apple cider can offer several health benefits. Apples are rich in vitamins and antioxidants. The spices, like cinnamon and ginger, have anti-inflammatory properties. They may help with digestion and boost your immune system. Drinking this cider can be a tasty way to enjoy these benefits. Is spiced apple cider safe for children? Yes, spiced apple cider is safe for children. It does not contain any alcohol, making it a great drink for all ages. Just watch the sugar content, especially if you are adding extra sweeteners. Kids can enjoy this warm drink, especially during cold months. Recommendations for purchasing high-quality spiced apple cider. When looking for pre-made spiced apple cider, check local farms or markets. Often, they sell fresh options made from local apples. Look for organic brands that use real spices without artificial flavors. Brands known for great flavors and quality ingredients. Some popular brands include Martinelli's and TreeTop. These brands are known for their quality and rich flavors. Always read the label to ensure you get real ingredients. This article covered how to make delicious spiced apple cider at home. We looked at ingredients, cooking steps, and tips for flavor. You can even personalize your cider with alcohol or sweeteners. Don’t forget storage tips to keep it fresh. Making spiced apple cider is simple and fun. You can enjoy it any time of year. Gather your supplies, get cooking, and savor every sip.

Spiced Apple Cider Deliciously Warm and Cozy Drink

As the chilly weather sets in, there’s nothing quite like a cup of spiced apple cider to warm your soul.

Newer posts
← Previous Page1 … Page5 Page6

dsad

© 2025 mealmaple • Built with GeneratePress

Our Policies

  • Copyright Policy
  • Cookie Policy
  • GDPR Policy
  • Privacy Policy
  • Disclaimer
  • Terms Of Use

More Information

  • Home
  • About
  • Contact
  • Appetizers
  • Dessert
  • Dinner
  • Drinks
©2025, mealmaple About Back To Top