Creamy Avocado Pasta Quick and Delicious Meal
Looking for a quick and delicious meal? Creamy Avocado Pasta is your answer! It’s easy to make and packed with
Looking for a quick and delicious meal? Creamy Avocado Pasta is your answer! It’s easy to make and packed with
![- 1 ½ cups all-purpose flour - ½ cup unsalted butter, softened - ¾ cup granulated sugar - 2 large eggs - 1 tablespoon lemon zest - 1 tablespoon fresh lemon juice - ½ teaspoon vanilla extract - 1 cup fresh or frozen blueberries - ¼ cup powdered sugar (for glaze) The key to making Lemon Blueberry Bread is the balance of ingredients. The main ingredients create a rich base. The flour gives structure, while butter adds moisture and flavor. The sugar sweetens it perfectly. Eggs help bind everything together. Flavor enhancers like lemon zest and juice bring brightness. They add a fresh taste. This bread is not just sweet; it has a zing from the lemon. Vanilla extract gives a warm background note. Blueberries are the star of this recipe. You can use fresh ones in season or frozen ones for convenience. Both options work well. The powdered sugar glaze adds a sweet finish. It makes the bread look and taste special. For the full recipe, check the full recipe section. This Lemon Blueberry Bread is simple to make, and the ingredients come together easily to create a delightful treat. First, preheat your oven to 350°F (175°C). Grease and flour a 9x5 inch loaf pan. This step helps the bread to slide out easily after baking. Next, in a bowl, whisk together the dry ingredients: 1 ½ cups all-purpose flour, 1 teaspoon baking powder, ½ teaspoon baking soda, and ¼ teaspoon salt. Mix well and set this bowl aside for now. In a large mixing bowl, cream together ½ cup of softened unsalted butter and ¾ cup of granulated sugar. Mix until the mixture looks light and fluffy. This step adds air to your batter, making it rise nicely. Now, add 2 large eggs to the butter mixture, one at a time. Mix well after each egg. This keeps the batter smooth and helps it rise. Next, stir in 1 tablespoon of lemon zest, 1 tablespoon of fresh lemon juice, and ½ teaspoon of vanilla extract. Mix until everything is well combined. The lemon adds a bright flavor. Gradually add the dry mixture to the wet mixture. Mix gently until just combined. Be careful not to overmix; this keeps the bread light. Now, gently fold in 1 cup of fresh or frozen blueberries using a spatula. This ensures the blueberries are spread evenly. Pour the batter into your prepared loaf pan. Smooth the top with a spatula to make it even. Bake in the preheated oven for 55-60 minutes. Check if it’s done by inserting a toothpick into the center. If it comes out clean, it's ready! Once baked, let the bread cool in the pan for about 10 minutes. Then, transfer it to a wire rack to cool completely. Enjoy your delightful Lemon Blueberry Bread! For more detailed instructions, refer to the Full Recipe. Use room temperature ingredients for better mixing. This helps your bread rise nicely. Cold ingredients can make the batter tough. Avoid overmixing to keep the bread light and fluffy. Mix until just combined. You want to see some lumps. This keeps the bread soft. To achieve the perfect glaze consistency, mix powdered sugar with lemon juice until smooth. The glaze should be thick but pourable. Add the glaze after the bread cools. This keeps the glaze from melting away. Drizzle it over the top for a nice finish. For presentation, slice the bread and serve it on a decorative plate. Add fresh blueberries and a twist of lemon peel for a bright touch. Pair this bread with coffee or tea. The flavors work well together. Enjoy a slice for breakfast or as a snack. {{image_2}} You can change the flavors of lemon blueberry bread to keep it exciting. - Orange Blueberry Bread: Swap the lemon zest for orange zest. This change gives a sweet, citrus twist. The orange adds a warm flavor that pairs well with blueberries. - Add-ins: Try adding nuts, seeds, or other fruits. Chopped walnuts or almonds add crunch. You can also mix in raspberries or strawberries for a fun twist. Some people have special diet needs. Here are two easy ways to adapt this recipe. - Gluten-Free Option: Use a gluten-free flour blend instead of regular flour. Make sure the blend is good for baking. This keeps the bread soft and delicious. - Vegan Option: You can make this bread vegan. Use flax eggs instead of real eggs. For the butter, choose a dairy-free option. This keeps the bread moist and tasty without animal products. Explore these variations to find your favorite twist on the classic lemon blueberry bread. For the complete recipe, check out the [Full Recipe]. To store your lemon blueberry bread at room temperature, wrap it in plastic wrap. Place it in an airtight container. This keeps the bread soft and moist. It will last for about 2 to 3 days. If you want to enjoy it longer, consider refrigerating it. For freezing, slice the bread first. Wrap each slice in plastic wrap tightly. Then, place all the slices in a freezer-safe bag. Remove as much air as you can. This helps prevent freezer burn. You can freeze lemon blueberry bread for up to three months. To enjoy, just thaw it at room temperature or warm it in the oven. When stored at room temperature, the bread stays fresh for 2 to 3 days. In the fridge, it can last about a week. If frozen, it can keep for up to three months. Always check for signs of spoilage, like mold or off smells, before eating. If you can't find fresh blueberries, don't worry! You can use frozen blueberries instead. They work well in this recipe. Thaw them first and drain excess liquid. Alternatively, you might try chopped strawberries or raspberries for a different taste. The best way to check doneness is to look for a golden-brown top. You can also gently press the top; it should spring back. Another way is to use a toothpick. If it comes out clean or with a few moist crumbs, it's ready. If you want more assurance, check the sides. They should pull away slightly from the pan. Yes, you can make Lemon Blueberry Bread ahead of time. After it cools, wrap it tightly in plastic wrap. Store it at room temperature for up to three days. For longer storage, you can freeze the bread. Just slice it and wrap each slice in foil. It will stay good in the freezer for about three months. When ready to eat, let it thaw at room temperature or warm it in the oven. This blog post covered how to make a delicious Lemon Blueberry Bread. We explored the key ingredients like flour, butter, sugar, and, of course, blueberries. I shared step-by-step baking instructions and some useful tips to ensure your bread turns out perfect every time. In my final thoughts, remember that baking is about experimenting. Don't hesitate to try new flavors or adaptations. Enjoy the process and the tasty results!](https://mealmaple.com/wp-content/uploads/2025/05/8f8a02ec-4809-47c6-a6b4-93a2e8fd78b5.webp)
If you love the bright taste of lemon and the sweetness of blueberries, you’re in for a treat! In this
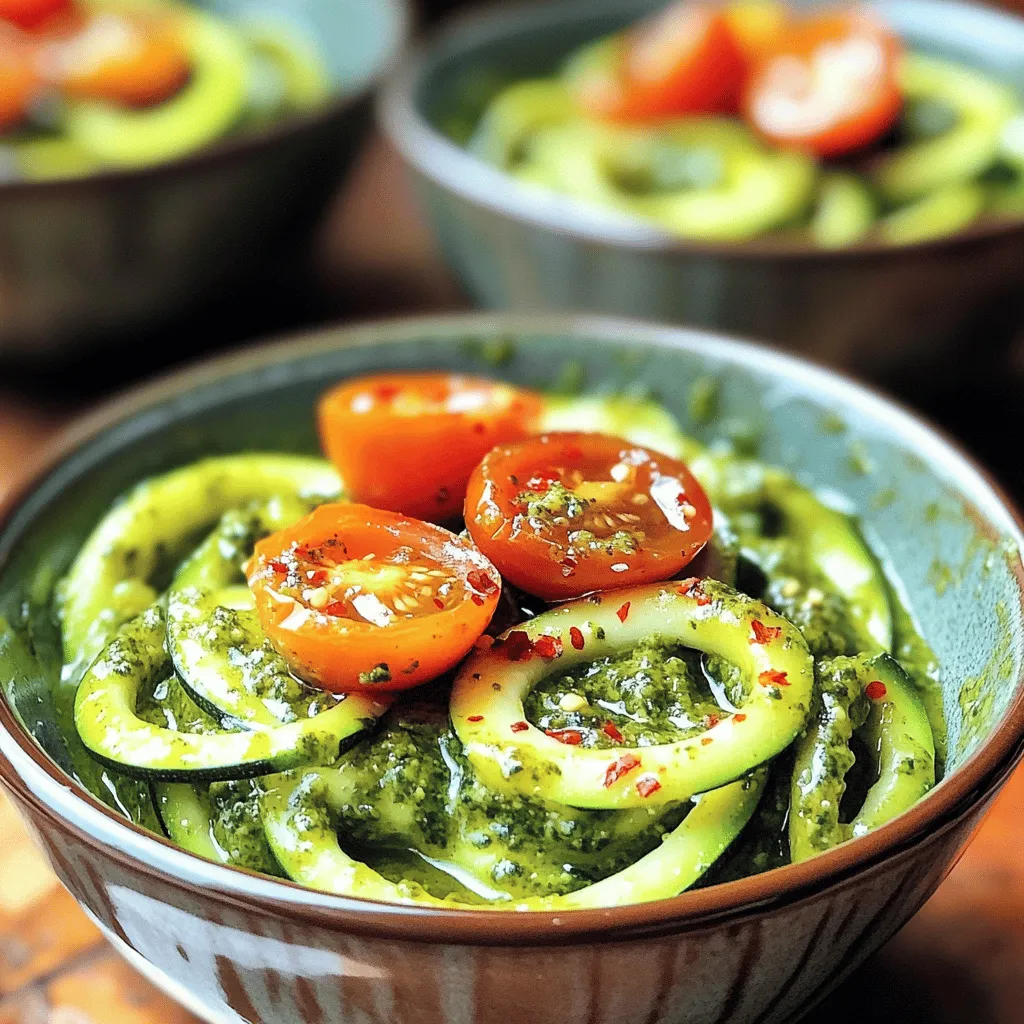
Are you ready to transform your meals with a fresh, tasty twist? Zucchini noodles with pesto offer a colorful and
![To make Chocolate Peanut Butter Overnight Oats, gather these simple items: - 1/2 cup rolled oats - 1 cup unsweetened almond milk (or milk of choice) - 2 tablespoons peanut butter (creamy or crunchy) - 1 tablespoon unsweetened cocoa powder - 1 tablespoon chia seeds - 1 tablespoon honey or maple syrup (adjust to taste) - 1/2 teaspoon vanilla extract - A pinch of salt - Toppings: sliced bananas, chopped dark chocolate, and crushed nuts You can swap out some ingredients for different flavors. Use any milk you like, such as oat or soy milk. If you want a nut-free option, use sunflower seed butter instead of peanut butter. For sweetness, try agave syrup or leave it out completely. You can also add spices like cinnamon for a warm touch. This recipe is both tasty and healthy. Each serving has about 350 calories. You get protein from the peanut butter and chia seeds. The oats provide fiber, which is great for digestion. If you top with bananas, you add potassium, too. Overall, this dish gives you energy and keeps you full for hours! For the full recipe, check out the section above. Making chocolate peanut butter overnight oats is easy and fun. Start by gathering your ingredients. You will need: - 1/2 cup rolled oats - 1 cup unsweetened almond milk - 2 tablespoons peanut butter - 1 tablespoon unsweetened cocoa powder - 1 tablespoon chia seeds - 1 tablespoon honey or maple syrup - 1/2 teaspoon vanilla extract - A pinch of salt - Toppings: sliced bananas, chopped dark chocolate, and crushed nuts In a medium bowl, mix the oats, almond milk, peanut butter, cocoa powder, chia seeds, honey or maple syrup, vanilla extract, and salt. Stir well until everything blends together. Then, pour the mixture into a mason jar or another airtight container. For creamy oats, use rolled oats instead of instant oats. Rolled oats soak well without becoming mushy. Use enough almond milk to keep oats moist. If you want creamier oats, add extra almond milk in the morning. Stir them well before eating. Prep takes only about ten minutes. After mixing, cover the jar and put it in the fridge. Let it chill overnight or for at least four to six hours. This gives the oats time to absorb the liquid and soften. You can make a few jars at once to enjoy all week. For a quick breakfast, prep on Sunday for the week ahead. Follow the [Full Recipe] for all details on making this tasty dish! To make creamy oats, use enough liquid. The ratio of oats to almond milk is key. For each half cup of oats, add a full cup of liquid. The almond milk should be cold, as it helps the oats soak well. Stir the mixture thoroughly to break up any clumps of peanut butter. If the oats look too thick after chilling, add a splash more milk before serving. When making these oats ahead, use an airtight container. This keeps the oats fresh and tasty. They last up to five days in the fridge. You can prepare several jars at once for quick breakfasts. Just top them with fresh fruits and nuts right before eating. This keeps the toppings crunchy and bright. Mix all your ingredients well in a bowl. Start with the almond milk, then add the oats. Add peanut butter next, followed by cocoa powder and chia seeds. Honey or maple syrup adds sweetness, so adjust it to your taste. Finally, sprinkle in a little salt to enhance the flavors. Mixing well ensures every bite is full of rich chocolate and peanut butter goodness. For the full recipe, check out the detailed steps above! {{image_2}} You can add many flavors to your chocolate peanut butter overnight oats. Try adding a scoop of protein powder for a boost. You can mix in your favorite spices too. Cinnamon or nutmeg adds warmth. You might also enjoy a splash of espresso for a coffee flavor. If you like fruit, add berries or diced apples for a fresh taste. Toppings can change your oats from good to great. You can use sliced bananas for a sweet touch. Chopped dark chocolate is a fantastic choice for extra richness. Crushed nuts add crunch. Try coconut flakes for a tropical flavor. You can also sprinkle some granola for added texture. Mix and match your toppings to keep it exciting! Making this recipe vegan is simple. Use almond milk or oat milk instead of dairy. Swap honey for maple syrup to keep it plant-based. For a gluten-free option, ensure your oats are certified gluten-free. This way, everyone can enjoy this tasty treat without worry. You can create a delicious meal that fits many diets! After making your chocolate peanut butter overnight oats, you might have some left. Store your oats in an airtight container. A mason jar works great. Keep them in the fridge. This keeps them fresh for the next day. Just remember to seal them tightly to avoid any weird smells. Your overnight oats can last in the fridge for up to five days. If you want to keep them longer, you can freeze them. Use freezer-safe containers or bags. When you are ready to eat, thaw them in the fridge overnight. They can taste just as good after freezing. If you prefer warm oats, you can reheat them. Take the oats out of the fridge and stir them. Add a splash of almond milk to help loosen them up. Heat in the microwave for about 30 to 60 seconds. Stir again and check the temperature. If they need more heat, pop them back in for another few seconds. Enjoy your warm, tasty oats! Overnight oats are a great breakfast choice. They are high in fiber, which helps digestion. They also provide steady energy thanks to complex carbs. Eating oats may lower cholesterol levels, which is good for heart health. The chia seeds add omega-3 fatty acids, great for your brain. Peanut butter adds protein and healthy fats, making you feel full longer. Yes, you can use many kinds of milk. Almond milk, soy milk, or oat milk work well. Each type adds a different flavor. Regular cow's milk is also fine if you prefer it. Just pick what you like best! You can keep overnight oats for up to five days in the fridge. The oats will soak up the liquid and stay fresh. Make sure to store them in an airtight container. If you notice any odd smells or textures, it’s best to toss them. Absolutely! This recipe is perfect for meal prep. You can make several jars at once. Just layer them in jars and keep them in the fridge. Grab one in the morning for a quick, healthy breakfast. You can add many fun flavors to this recipe! Try adding fruits like berries, apples, or peaches. Nuts and seeds can give a nice crunch. You might also like a dash of cinnamon or a sprinkle of cocoa nibs. Mix and match to find your favorite! In this blog post, we explored how to make chocolate peanut butter overnight oats. We discussed the ingredients needed, prep steps, and ways to ensure the best texture. I shared tips for storage and delicious variations. Remember, these oats are easy to customize for your taste. They are a healthy meal option and good for meal prep too. I hope you feel inspired to make your own overnight oats and enjoy this tasty dish!](https://mealmaple.com/wp-content/uploads/2025/05/c39c5fbb-a63d-47d4-a4aa-80f479d1b2a7.webp)
Are you ready to enjoy a delicious breakfast that fuels your day? Chocolate Peanut Butter Overnight Oats are a tasty
![To make a tasty veggie stir fry, gather these fresh and colorful ingredients: - Fresh vegetables for stir-fry: - 1 cup broccoli florets - 1 bell pepper (any color), sliced - 1 carrot, julienned - 1 zucchini, sliced - 1 cup snap peas, trimmed - Flavoring agents: - 3 tablespoons soy sauce (low sodium) - 1 tablespoon sesame oil - 1 tablespoon fresh ginger, minced - 2 cloves garlic, minced - Cooking essentials: - 2 tablespoons vegetable oil - 1 teaspoon cornstarch mixed with 2 tablespoons water (optional for thickening) - Garnish and serving options: - Sesame seeds for garnish - Cooked rice or noodles for serving These ingredients come together to create a quick and flavorful meal. You can mix and match your favorite veggies too! For the full recipe, check out the Easy Veggie Stir Fry. Start by washing all your vegetables under cold water. This step removes dirt and bacteria. Next, chop the veggies uniformly. Cut them into similar sizes. This helps them cook evenly. For example, slice the bell pepper and julienne the carrot. Uniform cuts ensure that everything gets tender at the same time. Heat a large skillet or wok over medium-high heat. Add vegetable oil and let it shimmer. This means the oil is hot enough. Now, add minced garlic and ginger to the pan. Sauté for about 30 seconds. You want to smell the aroma, but be careful not to burn them. Next, toss in the sliced bell pepper, broccoli, and carrot. Stir-fry these veggies for 3-4 minutes. They should start to soften but still be crisp. Then, add the zucchini and snap peas. Keep stir-frying for another 2-3 minutes. The goal is for all the veggies to be tender yet still vibrant. Now it’s time to add flavor. Pour in the soy sauce and sesame oil. Stir well to coat every piece of vegetable. If you want a thicker sauce, use the cornstarch mixed with water. Add it now and allow it to cook for an extra minute. This will give your stir-fry a nice glaze. Before serving, check the texture and flavor. Everything should be fresh and colorful. Enjoy this easy veggie stir fry with cooked rice or noodles. For the full recipe, check the link provided. For a great stir-fry, heat your pan to medium-high. This helps veggies cook fast while keeping them crisp. Cook for about 5 to 7 minutes total. You want to hear that sizzle! To avoid overcooking, add your harder veggies first. Start with broccoli, bell pepper, and carrot, then add softer ones like zucchini and snap peas later. This way, all veggies stay bright and crunchy. When seasoning, balance is key. Use soy sauce for saltiness and sesame oil for richness. Taste as you go! If you want a lighter option, try coconut aminos instead of soy sauce. You can also swap sesame oil with olive oil for a different twist. Serve your stir-fry over cooked rice or noodles for a filling meal. You can also mix in quinoa for extra protein. For garnishing, sprinkle sesame seeds on top. Fresh herbs like cilantro or green onions can add a nice touch too! Enjoy your vibrant dish and explore different flavors with each bite. {{image_2}} You can boost your veggie stir-fry by adding protein. Tofu is a great choice. It absorbs flavors well and adds a nice texture. Firm or extra-firm tofu works best. Simply press it to remove excess water, then cut it into cubes. Tempeh is another option. It has a nutty flavor and is packed with protein. Slice it thinly and sauté it with your veggies. Chickpeas also add protein and a nice bite. Use canned or cooked chickpeas, and add them in during the last few minutes of cooking. Stir-fries are fun because you can use many vegetables. Seasonal veggies add freshness. In spring, try asparagus or snap peas. In summer, bell peppers and zucchini shine. Fall brings squash and carrots. Winter is great for broccoli and bok choy. Don't be afraid to mix and match! You can make your stir-fry healthier with simple swaps. For sauces, use low-sodium soy sauce to cut down on salt. You can also try coconut aminos for a sweet, mild flavor. If you want gluten-free options, look for tamari. For oil, consider using less sesame oil. You can also use vegetable broth instead of oil for sautéing. These changes keep your dish tasty while being good for you. You can store your veggie stir-fry in the fridge for up to three days. Make sure to place it in an airtight container to keep it fresh. If you notice any moisture, use a paper towel to absorb it before sealing. This keeps the veggies crisp and tasty. To freeze your stir-fry, use freezer-safe bags or containers. First, let the stir-fry cool completely. Then, portion it out into bags. Remove as much air as possible before sealing. You can freeze it for up to three months. This is a great way to enjoy a quick meal later. When reheating, I recommend using a skillet over medium heat. Add a splash of water or vegetable broth to keep it moist. Stir often until it’s heated through. You can also microwave it, but cover it with a damp paper towel. This helps keep the texture nice and avoids drying it out. If you don’t have soy sauce, you can use a few alternatives. Consider using tamari, which is gluten-free. Coconut aminos is another great choice. It has a slightly sweeter taste. You could also try mixing balsamic vinegar with water and a pinch of salt. This mix adds depth and flavor to your dish. Yes, you can make the stir-fry ahead of time! Prep your veggies in advance. Chop and store them in the fridge. You can also mix the sauce and keep it ready. When you're ready to cook, just heat the pan and stir-fry the veggies. This way, you save time and still enjoy a fresh meal. To spice up your stir-fry, add chili flakes or fresh chopped chili. You can also use sriracha or chili paste. If you like it really hot, try adding a dash of hot sauce right at the end. Always add heat gradually, so you can find your perfect spice level. For the complete Easy Veggie Stir Fry recipe, check out the [Full Recipe]. Stir-frying is a simple way to enjoy fresh veggies and bold flavors. We covered essential ingredients, cooking steps, and helpful tips to perfect your dish. You can adjust the recipe to fit your taste and health needs. Remember, stir-frying is fast, fun, and opens up many options. You can add protein, try different veggies, or even make it spicy. Keep your leftovers in the fridge or freeze them for later. Dive into the easy veggie stir-fry recipe anytime for a delicious meal. Enjoy your cooking journey!](https://mealmaple.com/wp-content/uploads/2025/05/5cbd93b7-6df4-4f43-a4e3-0f08e1c625bd.webp)
Looking for a quick and tasty meal? My Easy Veggie Stir Fry is just what you need! With colorful veggies
![- 1 large loaf of crusty bread (ciabatta or sourdough) - 1 cup fresh spinach, chopped - 1 cup canned artichoke hearts, drained and chopped - 1 cup cream cheese, softened - 1/2 cup sour cream - 1/2 cup mayonnaise - 1 cup shredded mozzarella cheese - 1/2 cup grated Parmesan cheese - 2 cloves garlic, minced - 1/2 teaspoon red pepper flakes (optional) - Salt and pepper to taste - Choosing the right type of bread: I love using ciabatta or sourdough. They have a crunchy crust and soft inside. This gives a great texture that holds the dip well. - Fresh vs. canned spinach: Fresh spinach adds a vibrant taste, but canned is fine too. Just drain it well to avoid excess water. - Importance of cheese quality: Always use good cheese. Freshly grated cheese melts better and tastes richer. Avoid pre-shredded options if you can. Using these ingredients will make your spinach artichoke dip stuffed bread truly special. Check out the Full Recipe for step-by-step instructions to create this delicious dish! - Preheat your oven to 375°F (190°C). - In a large bowl, combine cream cheese, sour cream, and mayonnaise. - Now, add chopped spinach, artichokes, and seasonings. - Stir until everything is well combined. You want a smooth mix that holds together. - Carefully prepare the bread loaf for stuffing. Slice off the top and hollow it out. - Fill the bread with the spinach artichoke mixture. Pack it in well; it should be full. - Now, wrap the loaf in aluminum foil and place it on a baking sheet. - Bake for 25-30 minutes until hot and the bread crust is crispy. - For a golden finish, take off the foil and bake for an extra 5-10 minutes. - Let it cool for a few minutes, then slice into pieces to serve. Enjoy your tasty treat! To make your spinach artichoke dip stuffed bread even tastier, try adding herbs. Fresh dill or oregano can bring out great flavors. You can also sprinkle some garlic powder or onion powder for extra depth. For a zingy twist, consider serving it with dipping sauces. A creamy ranch or zesty marinara sauce pairs well with the rich filling. You can even try a tangy yogurt sauce if you want something lighter. This stuffed bread is perfect for casual gatherings or game days. Slice it into pieces and serve it as an appetizer. It also shines at parties and potlucks. Pair it with a fresh salad for a complete meal that everyone will love. For drinks, serve it with a light beer or sparkling water. Both options balance the richness of the dip and bread. If you want a healthier option, try air frying the stuffed bread. It cooks fast and gives you a nice crunch without much oil. Just wrap the bread in foil and place it in an air fryer. Cook at 375°F (190°C) for about 20 minutes. For those who love crispy edges, you can also bake it without the foil for the last few minutes. This lets the top get golden and crunchy. You’ll get a nice contrast to the soft filling inside. For the complete recipe, check out the Spinach Artichoke Dip Stuffed Bread. {{image_2}} You can make this dish even better by swapping some ingredients. Try using avocado or mushrooms instead of artichoke hearts. Both add a creamy texture and great taste. If you want a lighter version, swap cream cheese for Greek yogurt. It cuts the fat and adds protein. Also, use low-fat mayonnaise for the dip. These swaps keep your dish healthy without losing flavor. Get creative with your cheese! Add sharp cheddar or creamy goat cheese for depth. Mixing different cheeses can enhance the flavor too. You can also add veggies like sun-dried tomatoes, bell peppers, or zucchini. These add color and taste. Just chop them small to mix well with the dip. Switch up your bread for new tastes. For a gluten-free option, use gluten-free bread. It tastes just as good! You can also explore flavored breads like garlic or herb bread. These add extra zest to your stuffed bread. Each type of bread gives a unique twist to the dish. For the full recipe, check out the Spinach Artichoke Dip Stuffed Bread recipe [Full Recipe]. To keep your stuffed bread fresh, wrap it tightly in plastic wrap. Place it in the fridge. This way, it stays tasty for up to three days. If you have more leftovers, freeze them. To freeze, slice the bread first. Wrap each slice in plastic wrap and then in aluminum foil. This helps keep the bread moist. You can freeze it for up to two months. For the best texture, reheat your stuffed bread in the oven. Preheat your oven to 350°F (175°C). Place the bread on a baking sheet. Heat it for about 10 to 15 minutes. This will make the bread crispy again. To avoid sogginess, do not cover the bread while reheating. This keeps the crust crunchy and the filling warm. You can keep stuffed bread in the fridge for three days. Signs of spoilage include a sour smell or mold. If the bread feels slimy, toss it out. Always check before eating leftovers. For frozen bread, use it within two months for the best taste. Yes, you can make this dish ahead of time. First, prepare the filling as directed. Then, stuff the bread but do not bake it. Wrap the stuffed bread tightly in plastic wrap. You can keep it in the fridge for up to 24 hours. When ready, bake it straight from the fridge. This helps keep the bread fresh and tasty. Absolutely! You can mix and match your cheeses. Some good options include cheddar or gouda. They add a different flavor to the dip. You can also try cream cheese blends for more creaminess. Just keep the total amount of cheese the same for the best results. To keep the bread crisp, avoid too much moisture. Use less sour cream or mayonnaise if needed. You can also bake the bread a bit before adding the filling. This gives it a head start on crisping up. Wrapping the bread loosely in foil helps too, as it allows some steam to escape. This article covered how to make a delicious stuffed bread with artichokes and spinach. We went through the key ingredients, step-by-step instructions, and tips for enhancing flavor. You learned how to choose the best bread, store leftovers, and a couple of alternative cooking methods. Now you’re ready to create a great dish for any occasion. Enjoy crafting this tasty treat, and don’t forget to share your results!](https://mealmaple.com/wp-content/uploads/2025/05/eda19896-45de-49b8-8964-fb3be0eaa7f5.webp)
Looking for a crowd-pleaser that combines creamy goodness with a crunchy bite? This Savory Spinach Artichoke Dip Stuffed Bread is
![Here are the ingredients you need for tasty cranberry orange muffins: - 1 ½ cups all-purpose flour - ½ cup granulated sugar - ½ cup brown sugar, packed - 1 tablespoon baking powder - ½ teaspoon baking soda - ½ teaspoon salt - 1 teaspoon ground cinnamon - 1 cup fresh cranberries, halved - Zest of 1 large orange - 2 large eggs - ½ cup unsweetened applesauce - ⅓ cup vegetable oil - 1 teaspoon vanilla extract - ½ cup orange juice (freshly squeezed for best flavor) You might need to adjust quantities based on your taste. You can swap granulated sugar with coconut sugar for a different flavor. If you want to reduce sugar, use only ½ cup of brown sugar. You can replace eggs with flax eggs (1 tablespoon flaxseed meal + 2.5 tablespoons water) if needed. For a healthier twist, you can use Greek yogurt instead of applesauce. Fresh cranberries are best for this recipe. They give a tart flavor that pairs well with orange. You can also use frozen cranberries if fresh ones are not available. Just make sure to thaw them first and drain off any excess water. Avoid using dried cranberries, as they will not give the same texture or taste in your muffins. Baking these cranberry orange muffins is fun and simple. Start by mixing the dry and wet ingredients separately. This keeps the muffins light and fluffy. Use a large bowl for the dry mix. Sift together flour, both sugars, baking powder, baking soda, salt, and cinnamon. This helps to blend everything well. Next, prepare the wet mix. In another bowl, whisk the eggs, applesauce, oil, vanilla, and orange juice. Make sure to blend them well. When both mixes are ready, it is time to combine them. Pour the wet mix into the dry mix. Stir gently until just blended. Do not overmix; it is okay to have some lumps. Set your oven to 375°F (190°C) to preheat. This ensures even baking. While the oven heats, prepare your muffin tin. You can use paper liners or spray the tin with non-stick spray. Fill each muffin cup about two-thirds full with the batter. This gives them room to rise without overflowing. Mixing is a key step in baking. Use a folding technique when combining wet and dry ingredients. This helps to keep the muffins airy. A rubber spatula works well for this. Gently fold the mixture until you see no dry flour. Remember, lumps are fine. They lead to a better texture in the final muffin. Now, scoop the batter into your prepared muffin tin. Each cup should be filled to about two-thirds. This allows them to rise beautifully. Finally, bake for 20-25 minutes. Check with a toothpick; it should come out clean. Enjoy the sweet aroma while they bake! For the full recipe, check the details above. To keep your muffins moist, use applesauce. This ingredient adds moisture without extra fat. Make sure your cranberries are fresh and not dried. Fresh cranberries burst during baking, releasing juice. Adding zest from an orange enhances flavor and moisture too. Avoid overmixing the batter; this can lead to tough muffins. Stir gently until the mixture is just combined. A common mistake is not measuring ingredients correctly. Use a kitchen scale for precise amounts. Another mistake is baking at the wrong temperature. Always preheat your oven to the right heat. Avoid opening the oven door too often, as this can affect baking time. Lastly, don’t let the muffins sit in the pan too long. They can become soggy if left too long. For fluffy muffins, use room-temperature eggs. Cold eggs can lead to dense muffins. Mix wet and dry ingredients separately before combining them. This helps distribute baking powder evenly. Remember, a few lumps in the batter are okay. Don’t worry about them! This technique helps create a light and airy texture. Follow these tips for perfectly moist and fluffy cranberry orange muffins. For the full recipe, check out the [Full Recipe]. {{image_2}} You can add nuts or seeds to your muffins for extra crunch. Try using chopped walnuts or pecans. These nuts blend well with the tartness of the cranberries. You can also try sunflower seeds or pumpkin seeds for a nut-free option. Just fold them into the batter before baking. This not only adds texture but also boosts the flavor. If you want to make a vegan version, swap the eggs with flaxseed meal. Mix one tablespoon of flaxseed meal with three tablespoons of water. Let it sit for five minutes before adding it to the batter. For a gluten-free option, use a gluten-free flour blend. Make sure the blend has xanthan gum for the best texture. These changes keep the muffins delicious while meeting your dietary needs. Want to mix it up? Add chocolate chips for a sweet twist. Semi-sweet or dark chocolate pairs great with cranberries. You can also add spices like nutmeg or ginger for warmth. Just sprinkle a teaspoon of your chosen spice into the dry mix. These additions give you a new way to enjoy your cranberry orange muffins. Each bite can be a delightful surprise! To keep your cranberry orange muffins fresh, store them in an airtight container. You can keep them at room temperature for up to three days. If you want them to last longer, the fridge is a good option. Just make sure to wrap them tightly in plastic wrap before placing them in the container. Freezing is a great way to save extra muffins. First, let them cool completely. Then, wrap each muffin in plastic wrap. Place the wrapped muffins in a freezer bag or container. They can stay in the freezer for up to three months. When you’re ready to enjoy them, just take out what you want. To reheat your muffins, you have a few options. For the best taste, use an oven. Preheat your oven to 350°F (175°C). Place the muffins on a baking sheet and heat for about 10 minutes. If you’re in a hurry, you can microwave them for about 15-20 seconds. Enjoy your warm muffins as if they were just baked! For the full recipe, check out the detailed steps above. Cranberry orange muffins stay fresh for about three days at room temperature. Store them in an airtight container. If you want them to last longer, freeze them. They can stay good in the freezer for up to three months. Yes, you can make the batter ahead of time. Just mix it and cover it tightly. Keep it in the fridge for up to 24 hours. When you're ready to bake, stir it gently to combine again. Fresh muffins will still rise well. You can use several substitutes for eggs. Applesauce works great since this recipe already has it. Use 1/4 cup of applesauce for each egg. You can also try mashed bananas or flaxseed meal mixed with water. Both options work well in keeping muffins moist. We covered all you need for perfect cranberry orange muffins. You learned about the best ingredients, mixing techniques, and tips for moist muffins. We explored fun variations for different diets and how to store them. With these steps, you can bake muffins that everyone loves. Trust these tips to make your baking fun and tasty. Enjoy your delicious creations!](https://mealmaple.com/wp-content/uploads/2025/05/83d51dad-e0db-447d-9d59-5fbbf6a1d5d4.webp)
Are you ready to bake some delightful Cranberry Orange Muffins? This simple recipe promises moist, flavorful bites that are perfect

Are you ready to try a tasty twist on a classic snack? Buffalo Cauliflower Bites blend crunch and flavor to
![To make pumpkin spice overnight oats, gather these simple ingredients: - 1 cup rolled oats - 1 cup almond milk (or your preferred milk) - ½ cup canned pumpkin puree - 2 tablespoons chia seeds - 2 tablespoons maple syrup (or honey) - 1 teaspoon pumpkin spice - ½ teaspoon vanilla extract - Pinch of salt These ingredients create a creamy and flavorful base. The oats soak up the milk, making them soft and tasty. Canned pumpkin adds a rich texture and a hint of sweetness. Chia seeds help thicken the mixture and boost nutrition. Maple syrup or honey sweetens it just right, while pumpkin spice gives that warm, cozy flavor. You can add some fun toppings to make your oats even better. Try these: - Chopped nuts - Dried cranberries - Coconut flakes These toppings add crunch and extra flavors. Nuts give a nice bite, dried cranberries add a sweet chew, and coconut flakes bring a tropical twist. You can mix and match to find your favorite combination. Enjoy your creation, and don't forget to check out the Full Recipe for more tips! First, gather all your ingredients. This makes things fast and easy. You need rolled oats, almond milk, pumpkin puree, chia seeds, maple syrup, pumpkin spice, vanilla extract, and a pinch of salt. Optional toppings like nuts or coconut can add flavor. In a bowl, add the rolled oats and almond milk. Next, mix in the pumpkin puree, chia seeds, maple syrup, pumpkin spice, vanilla extract, and salt. Stir it all together well. Make sure each oat gets coated in the pumpkin mix. This helps the oats soak up all the good flavors. Now, divide the mixture into two mason jars or any airtight containers. Seal them tight and place them in the fridge. Let them chill overnight or for at least 4-6 hours. This time lets the oats soften and absorb the milk. In the morning, stir the oats. If they seem too thick, add a splash of almond milk. Enjoy them right from the jar or serve in a bowl. This is a simple way to have a tasty breakfast! You can find the Full Recipe [here]. To get the right texture in your pumpkin spice overnight oats, use the right ratio of oats to liquid. I like one cup of oats to one cup of milk. This mix gives a creamy feel. If you want thicker oats, add less milk. For creamier oats, add a bit more. Always stir well after soaking. This helps mix the oats with the pumpkin puree. If you find them too thick in the morning, just add a splash of milk to loosen them up. To make your oats burst with flavor, use fresh spices. I love using fresh pumpkin spice. It adds warmth and depth. You can also try adding a splash of vanilla extract. This gives a lovely aroma. If you want more sweetness, add extra maple syrup or honey. Don’t forget to add a pinch of salt. It balances the sweetness and enhances all the flavors. For a twist, mix in some chocolate chips or dried fruit for extra taste. These oats are great for meal prep. You can make a big batch on a Sunday. Simply double or triple the recipe. Store them in jars in the fridge for easy breakfasts. They last well for four to five days. When ready to eat, just grab a jar. You can enjoy them cold or heat them for a warm breakfast. Top with your favorite nuts or fruit to keep things exciting. This way, you have a tasty meal ready to go each morning. For the complete recipe, be sure to check the Full Recipe section above. {{image_2}} You can switch the milk in this recipe to fit your taste. Almond milk is great, but you can use any milk. Try oat milk for a creamy texture or soy milk for extra protein. If you want a rich flavor, use whole milk or coconut milk. Each type adds a unique taste to the oats. This recipe is flexible with seasonal ingredients. In fall, use fresh pumpkin if you can find it. In spring, try using fresh berries instead of pumpkin. You can also swap pumpkin spice with cinnamon or nutmeg for a different twist. Get creative and make it fun with what you have! Adding flavors can take your oats to the next level. Try stirring in a spoonful of nut butter for creaminess. You can also mix in some cocoa powder for a chocolatey kick. For extra sweetness, add a splash of vanilla or a dash of maple extract. The options are endless, so have fun experimenting! Store your pumpkin spice overnight oats in airtight containers. Glass mason jars work great for this. Always seal them tightly to keep out air and moisture. This helps maintain freshness and flavor. If you use toppings, add them right before serving. This keeps them crunchy. When stored properly, your overnight oats last up to five days in the fridge. The oats and pumpkin flavors will blend better over time. However, they may lose some texture after a few days. If you notice any off smells, it’s best to toss them out. You can enjoy these oats cold or warm them up. To heat, transfer the oats to a microwave-safe bowl. Heat in short bursts of 30 seconds, stirring in between. If the oats seem thick, add a splash of almond milk to loosen them up. Enjoy them straight from the bowl or jar! For the full recipe, check out the complete guide. Yes, you can easily make Pumpkin Spice Overnight Oats vegan. To do this, use almond milk or any plant-based milk. Instead of honey, stick with maple syrup. Both swaps keep the recipe delicious and vegan-friendly. You can store overnight oats in the fridge for up to five days. Just make sure to keep them in an airtight container. This way, they stay fresh and ready for a quick breakfast. If you want to swap maple syrup, try using agave nectar or honey. Both options add sweetness without changing the taste much. You could also use mashed bananas for a healthy twist. This blog post walked you through making pumpkin spice overnight oats. You learned about key ingredients, mixing steps, and storage tips. I shared helpful tricks to boost flavor and various options to change things up. Remember, you can use different milk or toppings to fit your taste. Storing your oats properly helps them last longer. Enjoy your delicious, healthy meal prep. It’s easy, fun, and keeps you satisfied!](https://mealmaple.com/wp-content/uploads/2025/05/8845a675-8a96-46bd-83c7-8afb1c5fe4d9.webp)
Fall flavors are here, and pumpkin spice overnight oats are a must-try! This easy and delicious recipe lets you enjoy
![- Red bell pepper - Yellow bell pepper - Zucchini - Red onion - Cherry tomatoes - Mushrooms When you choose your vegetables, pick fresh and colorful ones. Red and yellow bell peppers add sweetness. Zucchini brings a nice crunch. Red onion gives a sharp bite, while cherry tomatoes burst with juice. Mushrooms add an earthy flavor. Together, they create a tasty mix that pleases your palate. - Olive oil - Balsamic vinegar - Garlic powder - Dried oregano - Salt and pepper The marinade is key for flavor. Start with olive oil, which adds richness. Balsamic vinegar gives a tangy kick. Garlic powder packs a punch without being too strong. Dried oregano adds a hint of the Mediterranean. Finally, salt and pepper balance everything out. Mix these together for a tasty coating. - Fresh basil For a finishing touch, consider fresh basil. It has a bright flavor that complements the grilled veggies. Just sprinkle it on top before serving. This small step adds color and freshness to your dish. You can find the full recipe in the section above. Enjoy making your skewers! First, grab a large bowl. You will whisk together olive oil and balsamic vinegar. This mix gives the skewers a tasty kick. Next, add garlic powder, dried oregano, salt, and pepper. This blend makes the marinade flavorful. Now, it’s time to chop the vegetables. Cut the red and yellow bell peppers into chunks. Slice the zucchini into thick rounds. Cut the red onion into quarters. You can leave the cherry tomatoes whole. Halve the mushrooms if they are large. Once chopped, place all the veggies in the bowl with the marinade. Toss them well to coat. The longer they sit, the better they soak up the flavor. For skewering, take wooden or metal skewers. If using wooden ones, soak them in water for at least 30 minutes. This helps prevent burning. Thread the marinated vegetables onto the skewers. Alternate types for color and variety. Preheat your grill to medium-high heat, around 400°F (200°C). Now, place the skewers on the grill. Grill them for about 10-15 minutes. Turn them every few minutes. This ensures all sides get those lovely grill marks. Enjoy the fragrant aroma as they cook! To get the best grill marks, preheat your grill to medium-high heat, around 400°F. This heat helps the veggies cook fast. When you place the skewers on the grill, leave space between them. This allows hot air to flow and cook all sides evenly. Turn the skewers every few minutes. This gives you those nice charred lines we all love. Soaking wooden skewers is vital. If you skip this step, they may burn on the grill. Soak them in water for at least 30 minutes. This simple trick helps keep your skewers intact and your veggies safe from flames. Grilled vegetable skewers shine with a great sauce or dip. Try serving them with a tangy balsamic glaze or a creamy garlic dip. You can also add a sprinkle of fresh herbs, like basil or parsley, for extra flavor. These simple touches elevate your dish and impress your guests. For more details on making these skewers, check the Full Recipe. {{image_2}} You can change up the vegetables to fit the season. Use what's fresh or on sale. Try asparagus in spring or butternut squash in fall. A mix of colors makes the skewers pop. Think about using purple eggplant or orange carrots. These swaps keep your dish exciting and tasty. Marinades can change the whole flavor. A citrus-based marinade adds a bright taste. Mix lemon juice, lime juice, and zest for a fresh kick. If you like heat, add chili flakes to your mix. This adds a spicy twist to your skewers, making them more fun. Herbs and spices can greatly enhance flavor. Fresh herbs like rosemary or thyme work well. You can even try smoked paprika for a deep, smoky taste. Don’t forget about cumin for an earthy flavor. These choices let you customize your skewers easily. Use what you love to make them perfect for your taste. For the full recipe, refer to the [Full Recipe]. To keep your grilled vegetable skewers fresh, store them in an airtight container. Place a piece of parchment paper between layers if stacking. This helps prevent sticking. Refrigerate them within two hours of grilling. They will stay good for up to three days. When you are ready to eat, check for any signs of spoilage. To reheat your skewers, use the oven or grill. Preheat your oven to 350°F (175°C). Place the skewers on a baking sheet and cover with foil. Heat for about 10 minutes. If using the grill, preheat it to low heat. Grill for about 5 minutes, turning often. These methods help keep the texture and flavor intact. Yes, you can freeze grilled vegetable skewers! Wrap each skewer tightly in plastic wrap. Then place them in a freezer-safe bag. They will stay fresh for up to three months. To use, thaw them in the fridge overnight. Reheat as mentioned above to enjoy your tasty meal again. You should grill vegetable skewers for about 10 to 15 minutes. Start with a preheated grill set to medium-high heat, around 400°F (200°C). Turn the skewers every few minutes for even cooking. Look for tender veggies with nice grill marks. If you want softer veggies, grill them a bit longer. Remember, each vegetable cooks at a different rate. For example, zucchini may cook faster than onions. Yes, you can use frozen vegetables, but they may change the flavor and texture. Frozen veggies often have more water. This can lead to sogginess when grilled. If you choose frozen, thaw them first and pat them dry. You may also need to adjust the cooking time. Start grilling them for a few extra minutes to ensure they cook through. You can add many items to your skewers! Think about adding proteins like chicken, shrimp, or tofu for a heartier meal. Fruits like pineapple or peaches also add a sweet twist. Just cut them into similar sizes for even cooking. Mixing veggies and fruits can create fun flavors. Get creative and customize your skewers based on your taste! For a full recipe, check out the Full Recipe section. You've learned how to make delicious vegetable skewers, from ingredient prep to grilling tips. Using fresh veggies, a tasty marinade, and solid grilling techniques will make your skewers shine. Don't forget to explore fun variations and serving ideas. These skewers are great for any meal or gathering. Keep experimenting and enjoy the flavors!](https://mealmaple.com/wp-content/uploads/2025/05/6cf1b6e4-aa33-4ece-9f17-afe5d1adc7c9.webp)
If you’re looking for a tasty and easy recipe, grilled vegetable skewers are a perfect choice. They’re colorful, flavorful, and