Skip to content
DisclaimerTerms Of UseGDPR PolicyCookie Policy

mealmaple

  • Home
  • Drinks
  • Appetizers
  • Dinner
  • Dessert
  • About
  • Contact
  • Privacy Policy
DisclaimerTerms Of UseGDPR PolicyCookie Policy

Evelyn

To make Rainbow Veggie Wraps, gather these fresh ingredients: - 4 large whole grain tortillas - 1 cup hummus (any flavor) - 1 cup shredded purple cabbage - 1 large carrot, julienned - 1 cup cucumber, thinly sliced - 1 bell pepper (any color), sliced into strips - 1 avocado, sliced - 1 cup alfalfa sprouts - Fresh cilantro or parsley for garnish - Salt and pepper to taste - Optional: squeeze of lime juice Rainbow Veggie Wraps are not only colorful but also healthy. Each wrap is filled with vitamins and fiber. The hummus adds protein and healthy fats. Here’s a breakdown per wrap: - Calories: 180 - Protein: 6g - Carbs: 30g - Fiber: 7g - Fat: 5g You can mix and match ingredients to fit your taste. Try these swaps: - Use spinach or lettuce instead of tortillas for a low-carb option. - Swap hummus for a bean spread or guacamole for a different flavor. - Use any seasonal veggies like zucchini or radishes for crunch. - Add grilled chicken or tofu for extra protein if desired. For the full recipe, check the earlier section. Enjoy making these vibrant wraps! First, wash all your veggies well. Clean vegetables are key for great taste. Peel and julienne the carrot into thin matchsticks. Slice the cucumber and bell pepper into strips. Shred the purple cabbage into fine pieces. Finally, slice the avocado carefully. Each veggie adds color and crunch to your wrap. Take a large whole grain tortilla and lay it flat. Spread about ¼ cup of hummus evenly on the tortilla. Leave a little space at the edges. Next, layer the shredded cabbage, carrot, cucumber, bell pepper, and avocado. Add a handful of alfalfa sprouts on top. Sprinkle with salt and pepper. If you like, add a squeeze of lime juice for zing. To roll your wrap, fold the sides of the tortilla in first. Start at one end and roll it tightly. Make sure it's packed but not too full. This helps to keep it together. Once rolled, slice each wrap diagonally in half. This makes for a pretty presentation. You can find the Full Recipe in this article for more details on each step. To keep your Rainbow Veggie Wraps crisp, use fresh veggies. Choose vibrant colors for a fun look. Wash and dry your vegetables before cutting. Cut them just before you assemble the wraps. This helps keep them from getting soggy. Store your wraps in a cool place until you are ready to eat. If you plan to eat them later, wrap them tightly in plastic wrap. Serve your Rainbow Veggie Wraps on a bright plate. Cut them diagonally to show off the colors inside. Pair them with a small bowl of hummus for a tasty dip. You can also add a side of fresh fruit for a sweet touch. This makes your meal colorful and fun. If you have kids, they will love the bright colors and flavors. These wraps go well with many drinks. Try a refreshing lemonade or iced tea. You can also serve them with a light salad. A simple green salad with lemon vinaigrette works great. For a heartier option, serve with a small bowl of soup. Tomato or vegetable soup complements the wraps well. Enjoy exploring different flavors and combinations! {{image_2}} You can make these wraps vegan by using hummus as your base. Choose a gluten-free tortilla to keep it gluten-free. Many brands offer tasty gluten-free options made with brown rice or corn. Check labels to ensure they meet your dietary needs. If you want more protein, add chickpeas or black beans. These beans mix well with the veggies. You can also try slices of grilled tofu or tempeh for a hearty bite. Nuts and seeds, like sunflower seeds or sliced almonds, also work great for crunch. Feel free to switch up the hummus. Try a spicy red pepper spread for heat. A creamy avocado spread adds smoothness. You might enjoy a light vinaigrette or tahini sauce too. Each sauce brings a new flavor, so mix and match to find your favorite. Check the [Full Recipe] for more ideas and tips. To keep your rainbow veggie wraps fresh, wrap them tightly in plastic wrap or foil. Place them in an airtight container. Store them in the fridge. They will stay good for about 2 to 3 days. Make sure to keep any extra hummus in a separate container to avoid sogginess. These wraps taste best fresh. However, if you want to heat them up, unwrap them. Place the wraps on a skillet over low heat. Heat each side for about 2 minutes. This warms the wraps without making them too soft. You can also use a microwave. Heat on low for about 15 to 20 seconds, but be careful. Microwaving can make the wraps chewy. You can freeze these wraps for later use. Wrap each one in plastic wrap, then place them in a freezer bag. Make sure to remove as much air as possible. They can last in the freezer for up to 2 months. When you are ready to eat, thaw them in the fridge overnight. Enjoy a fresh taste by adding new veggies or hummus before serving. For the complete recipe, check out the Full Recipe section. Rainbow veggie wraps are colorful, fresh, and healthy meals. They use whole grain tortillas filled with veggies. You can add hummus for creaminess and flavor. The bright colors come from different vegetables like carrots, cucumbers, and bell peppers. These wraps are fun and easy to make. They are great for lunch or a light dinner. Plus, they look beautiful on a plate! Veggie wraps can last about 3 to 4 days in the fridge. Store them in an airtight container to keep them fresh. If you use very wet ingredients, like tomatoes, they might get soggy faster. To keep your wraps crispy, eat them sooner rather than later. Yes, you can make these wraps ahead of time! They are perfect for meal prep. Just follow the steps in the full recipe. Prepare and wrap them, then store them in the fridge. Just remember to keep the wraps sealed well. This will help them stay fresh. You can use many types of vegetables in wraps! Some great options include: - Spinach - Kale - Zucchini - Radishes - Bell peppers (any color) - Broccoli - Cherry tomatoes Feel free to get creative! Use your favorite veggies to make your wraps unique. In this article, we covered how to make delicious Rainbow Veggie Wraps, including ingredients, tips, and storage advice. You learned about ingredient substitutes and how to keep your wraps fresh. We also explored various options to cater to different diets. These wraps are versatile and easy to prepare. You can mix and match ingredients based on your tastes and needs. Enjoy experimenting with flavors and textures to create your perfect wrap. Now, grab your veggies and start rolling!

Rainbow Veggie Wraps Packed with Flavor and Freshness

Looking for a colorful and healthy snack? Rainbow Veggie Wraps are your answer! These wraps are packed with fresh veggies

- 1 cup steel-cut oats - 2 cups vegetable broth - 1 cup fresh spinach, chopped - 1 large egg - 1 tablespoon olive oil - 2 cloves garlic, minced - 1/2 teaspoon turmeric - Salt and pepper to taste - Crumbled feta cheese (optional) - Fresh herbs (like parsley or chives) for garnish Each serving has about 300 calories. The macronutrient breakdown is roughly: - Carbohydrates: 40g - Fats: 10g - Protein: 12g Spinach is rich in vitamins K, A, and C. It also has iron and calcium. Oats are high in fiber, which helps digestion and keeps you full. They also lower cholesterol. Olive oil contains healthy fats that support heart health. It can reduce inflammation and improve brain function. 1. First, grab a medium saucepan. Pour in 2 cups of vegetable broth. 2. Turn the heat up to high and bring the broth to a boil. 3. Once boiling, add 1 cup of steel-cut oats to the pot. 4. Reduce the heat to a simmer. Cook for 20 to 25 minutes. Stir the oats occasionally. They should become tender and thick. 1. While the oats cook, heat 1 tablespoon of olive oil in a separate pan over medium heat. 2. Add 2 cloves of minced garlic to the pan. Sauté until it smells nice, about 1 minute. 3. Next, toss in 1 cup of chopped spinach. Sauté until it wilts, which takes about 2 to 3 minutes. 4. Sprinkle in 1/2 teaspoon of turmeric, and add salt and pepper to taste. Mix well and set aside. 1. Decide if you want a poached egg or a fried egg. 2. For a poached egg, bring water to a gentle simmer in a small pot. Create a whirlpool and crack the egg into it. Cook for 3 to 4 minutes. 3. For a fried egg, just cook it in a skillet. Wait until the whites are set and the yolk is still runny. 4. Once the oats are ready, divide them into bowls. Top each bowl with sautéed spinach and the egg. You can find the full recipe for this delicious dish above. Enjoy your savory oatmeal! To get the right texture for your savory oatmeal, adjust the cooking time. If you want it thicker, cook the oats a bit longer. For a creamier texture, add more broth. Stir the oats often while they cook. This helps them cook evenly and get nice and fluffy. Spices can really boost the flavor of your dish. Try adding a pinch of cumin or chili flakes for warmth. Fresh herbs like basil or thyme add a nice touch too. You can also swap the feta cheese for goat cheese or cheddar for a different flavor. When serving, use deep bowls for a rustic look. This makes the dish feel cozy and inviting. Drizzle a little olive oil on top for a shiny finish. A sprinkle of freshly cracked black pepper adds flavor and looks nice too. For extra flair, add fresh herbs on top. It brightens the dish and makes it pop! For the full recipe, check out the details above. {{image_2}} You can switch up the protein in this dish with ease. Instead of a fried or poached egg, use hard-boiled eggs for a quick option. You can slice them on top for a nice look. If you want something different, try scrambled eggs. They mix well with the oats and spinach. For those who prefer a vegan meal, tofu or chickpeas are great choices. Firm tofu works well when sautéed. Just cube it and add it to the spinach. Chickpeas add a nice texture and protein punch. They blend well with the oats. Feel free to change the greens. If you want something other than spinach, kale is a great switch. It has a robust flavor and pairs well with oats. Arugula adds a peppery kick that can brighten your bowl. You can also think about using seasonal veggies. Roasted peppers or zucchini can add color and taste. Another option is to mix in some broccoli or asparagus. They add crunch and nutrients. Use what you have on hand to keep it fresh and exciting. Experiment with different flavors to make this dish your own. You can add spices like cumin or paprika for a warm twist. Fresh herbs like basil or cilantro can brighten the dish too. Try drizzling some soy sauce or hot sauce on top. These can add depth and zing to your meal. You can also serve it with a dollop of yogurt for creaminess. Each option brings a unique flair to your savory oatmeal. For the full recipe, check out the detailed instructions above. To store leftovers, let them cool first. Place the oatmeal in an airtight container. This keeps it fresh and prevents it from drying out. The best containers for storage are glass or BPA-free plastic. They seal well and are easy to clean. For reheating oatmeal, the best methods are using the stove or microwave. If using the stove, add a splash of water or broth to the pot. Heat it over low heat, stirring often. This helps keep the flavor and texture. In the microwave, heat in short bursts. Stir between each burst to avoid hot spots. Yes, you can freeze savory oatmeal. To do this, cool it completely before freezing. Use freezer-safe containers or bags. When you're ready to eat, thaw it overnight in the fridge. Reheat it on the stove or in the microwave, adding extra liquid if needed. Yes, you can make this savory oatmeal vegan. Instead of using a regular egg, try these substitutes: - Silken tofu: Blend silken tofu until smooth. Add it to your dish as a creamy topping. - Chickpea flour: Mix 1 tablespoon of chickpea flour with 3 tablespoons of water. Cook it in a pan until firm. - Avocado: Slice a ripe avocado and place it on top of the oatmeal for creaminess. These options replace the egg while keeping your dish delicious and filling. To make your oatmeal creamier, try these tips: - Add more liquid: Stir in extra vegetable broth or water as the oats cook. This helps soften them. - Stir in dairy or plant milk: A splash of milk (dairy or almond) can add creaminess. - Mix in nut butter: A spoonful of almond or peanut butter gives richness and flavor. These simple steps will enhance the texture and taste of your savory oatmeal. This savory oatmeal pairs well with many sides and drinks: - Toast: Serve with whole-grain toast or avocado toast for added crunch. - Salad: A fresh side salad with lemon vinaigrette complements the flavors. - Juice: Pair with a glass of fresh orange juice or a green smoothie for a refreshing drink. These pairings can create a balanced and tasty meal to enjoy! In this blog post, we explored a tasty oatmeal dish with healthy ingredients. You learned about essential components like oats, spinach, and olive oil, along with their nutritional benefits. We discussed step-by-step cooking methods, tips to enhance texture, and variations to suit your taste. As you try this recipe, remember you can adapt it in many ways. Cooking is about creativity and fun. Enjoy making this healthy meal your own!

Savory Oatmeal with Spinach and Egg Delicious Recipe

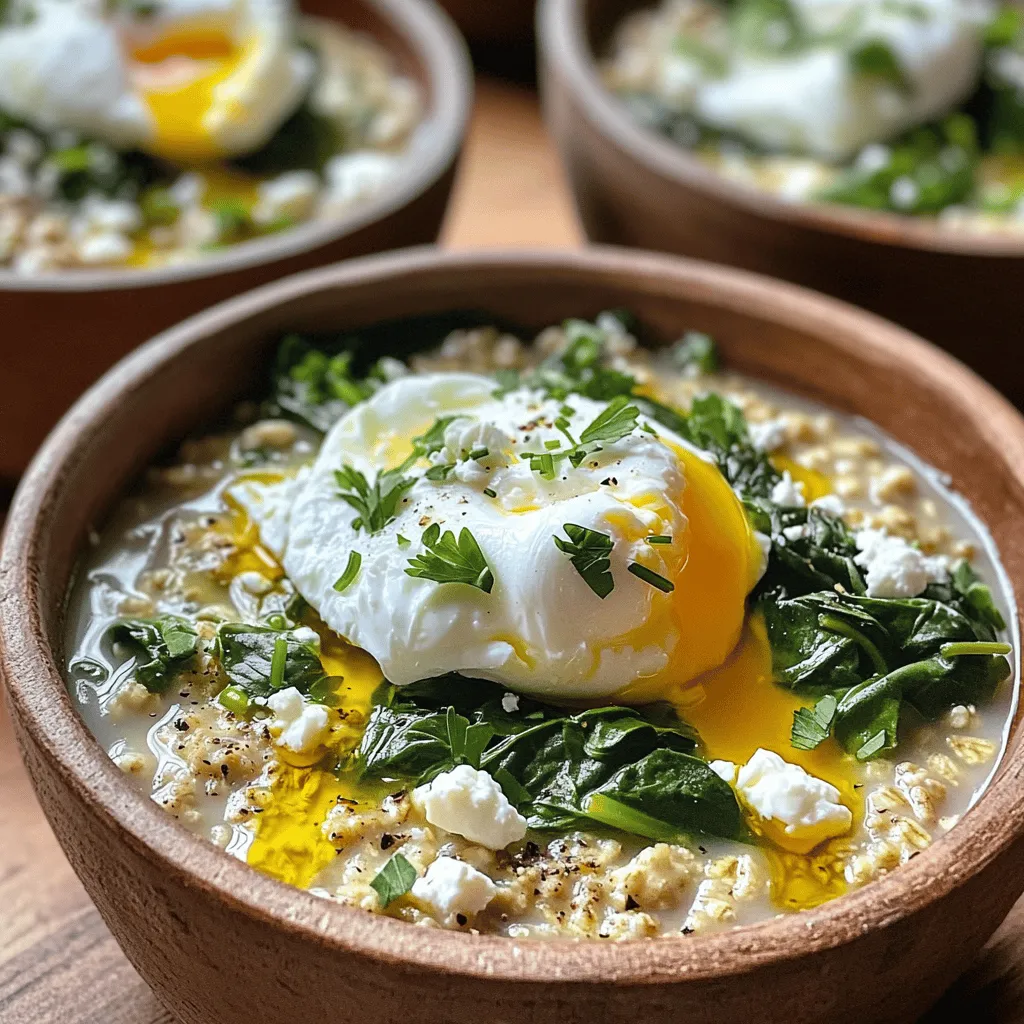
Looking for a warm, filling dish that’s packed with nutrients? My savory oatmeal with spinach and egg is just what

To make these tasty brownies, you need the following items: - 1 cup unsalted butter (2 sticks) - 2 cups granulated sugar - 4 large eggs - 1 teaspoon vanilla extract - 1 cup all-purpose flour - 1 cup unsweetened cocoa powder - 1 teaspoon baking powder - 1 teaspoon salt - 1 cup semi-sweet chocolate chips - 1/4 cup fresh mint leaves, finely chopped - 1/2 teaspoon peppermint extract These ingredients create a rich, chocolatey base with a fresh mint flavor that stands out. You can switch things up with these optional ingredients: - Powdered sugar for dusting - Crushed nuts like walnuts or pecans - Swirls of cream cheese or peanut butter These extras can add fun textures or flavors to your brownies. You will need some simple tools to make this recipe: - 9x13 inch baking pan - Medium saucepan - Mixing bowls - Whisk - Spatula - Toothpick for testing Having these tools ready will help you enjoy the process of making these brownies. Check out the Full Recipe for more details. First, gather all your ingredients. You need butter, sugar, eggs, and more. Next, preheat the oven to 350°F (175°C). Grease a 9x13 inch pan or line it with parchment paper. This helps the brownies come out easily after baking. In a medium saucepan, melt the butter over low heat. This takes only a few minutes. Once melted, mix in the granulated sugar. Stir until it blends well. After that, let the mixture cool down a bit. Then, add the eggs one at a time. Mix in the vanilla extract and peppermint extract. This adds that special minty flavor. In another bowl, whisk together the flour, cocoa powder, baking powder, and salt. This ensures even mixing. Slowly add the dry mix to the wet ingredients. Stir gently until just combined. Be careful not to overmix, or your brownies may turn out tough. Now it's time to fold in the chocolate chips and mint leaves. This gives your brownies a burst of flavor. Pour the batter into the prepared pan, spreading it evenly. Place it in the oven and bake for 25-30 minutes. Use a toothpick to check if they are done. The toothpick should come out with a few moist crumbs, not wet batter. Once they finish baking, take them out of the oven. Let the brownies cool in the pan for about 10 minutes. This helps them set up properly. After that, transfer them to a wire rack to cool completely. Once cool, cut them into squares. If you want to impress, dust them with powdered sugar. This adds a nice touch and looks great. For the full recipe, check below! To make the best chocolate mint brownies, you must use quality ingredients. Start with fresh eggs and good cocoa powder. For a fudgy texture, don’t overmix your batter. Mix just until combined. Keep an eye on your baking time. Every oven is different, so check the brownies a few minutes early. A toothpick should come out with a few moist crumbs. One common mistake is opening the oven door too soon. This can cause your brownies to sink. Another mistake is using cold ingredients. Always bring your butter and eggs to room temperature. Avoid adding too much flour; this can make your brownies dry. Finally, don’t skip the cooling step. Letting them cool helps the flavors develop. Mint can take your brownies to the next level. Use fresh mint leaves for a bright taste. Just chop them finely and mix them into your batter. You can also add peppermint extract for a stronger flavor. Start with a small amount; you can always add more. For a fun twist, try adding mint chocolate chips instead of regular ones. This gives you bursts of mint in every bite! For the full recipe, check out the earlier section. {{image_2}} To make gluten-free chocolate mint brownies, swap all-purpose flour for a gluten-free blend. Look for a blend that includes rice flour and tapioca. This keeps the texture soft and moist. You can follow the full recipe for guidance. Just ensure that all your other ingredients are also gluten-free. Add the same amount of mint for that fresh taste. For vegan chocolate mint brownies, replace the eggs with flax eggs. Mix 1 tablespoon of ground flaxseed with 2.5 tablespoons of water for each egg. Let it sit until it thickens. Use coconut oil instead of butter. It gives a nice flavor and keeps the brownies rich. You can also use maple syrup in place of granulated sugar for a delicious twist. If you want to mix it up, try using orange zest instead of mint. The citrus gives a bright taste. You can also use sea salt for a sweet and salty combo. Another idea is to add espresso powder for a mocha flavor. This enhances the chocolate and adds depth. Each combination offers a unique twist on the classic brownie. Enjoy experimenting with these flavors! To keep your chocolate mint brownies fresh, place them in an airtight container. This helps lock in moisture and keeps them soft. You can store them at room temperature for up to three days. If you want them to last longer, consider refrigerating them. Just remember, cold brownies might be a bit firmer. If you have extra brownies, freezing is a great option. Wrap each brownie in plastic wrap, then place them in a freezer bag. This prevents freezer burn and keeps them tasty. You can freeze them for up to three months. When you're ready to enjoy them, just take them out and let them thaw at room temperature. To refresh your brownies, you can warm them up slightly. Place a brownie on a microwave-safe plate and heat it for about 10-15 seconds. This will make the chocolate chips melt a bit, creating a gooey texture. You can also enjoy them cold or at room temperature for a different experience. For an extra treat, top them with ice cream or whipped cream! If you want the full recipe, check out the Minty Choco Delight Brownies recipe above. These brownies taste minty due to fresh mint leaves and peppermint extract. The fresh mint gives a bright, natural flavor. The peppermint extract enhances the mint taste, making it rich and bold. Both ingredients work together, creating a delightful chocolate-mint balance that is hard to resist. Yes, you can use different types of chocolate! Milk chocolate will give a sweeter taste. Dark chocolate adds a rich depth. You can also try white chocolate for a fun twist. Just make sure to adjust sugar levels as needed, depending on the chocolate’s sweetness. You can find chocolate mint brownies at many bakeries. Local cafes often serve them as well. If you want homemade ones, check online for delivery options. You can also purchase them at specialty dessert shops. If you prefer, try making your own with the Full Recipe. In this post, we covered how to make chocolate mint brownies, from the right ingredients to helpful cooking tools. You learned how to prepare, bake, and serve perfect brownies. We also shared tips to avoid common mistakes and ways to enhance flavor. For those looking for options, gluten-free and vegan variations were discussed. Lastly, you now know how to store and reheat leftovers effectively. Enjoy baking these treats and impressing your friends with your skills!

Chocolate Mint Brownies Irresistible and Easy Recipe

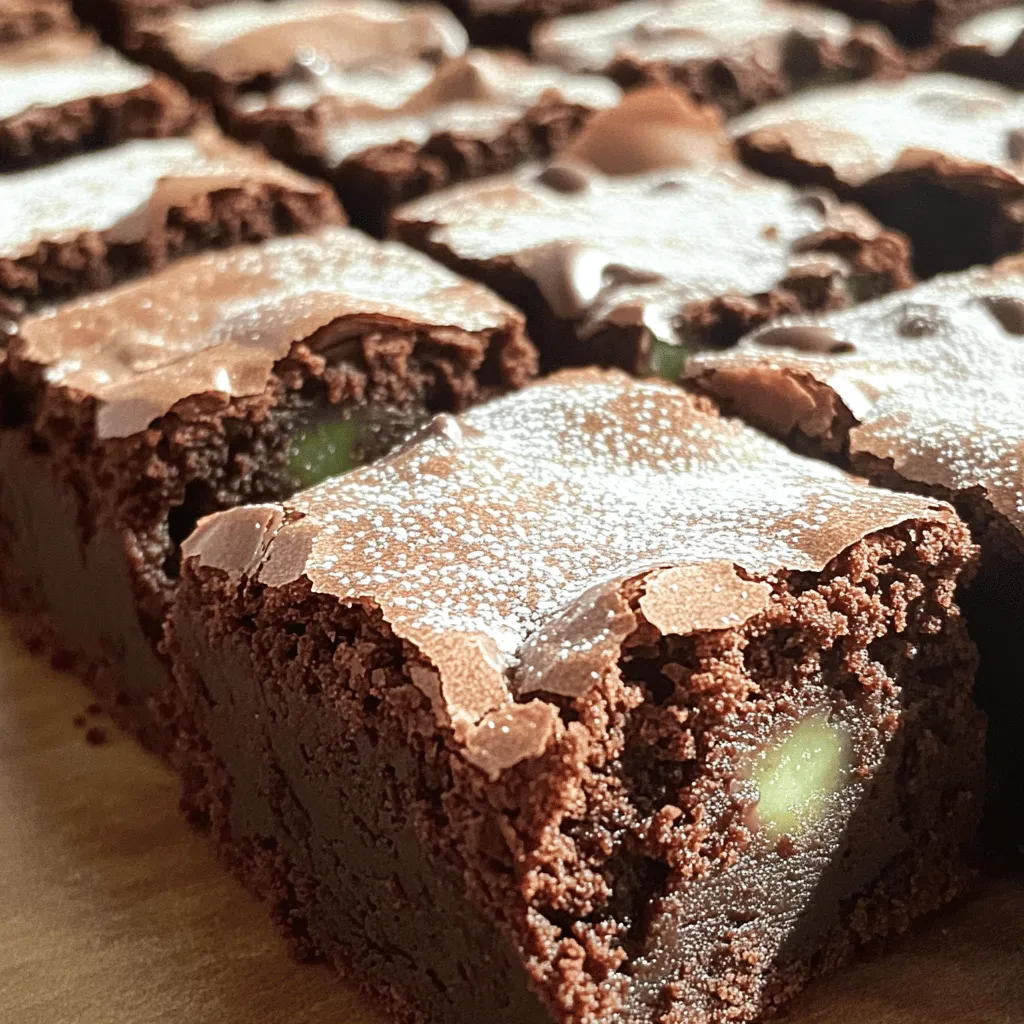
If you love chocolate and mint, you’re in for a treat! This easy recipe for Chocolate Mint Brownies will delight

For the best slow cooker chicken tacos, gather these key ingredients: - 2 lbs boneless, skinless chicken thighs - 1 medium onion, diced - 2 cloves garlic, minced - 1 can (15 oz) diced tomatoes with green chilies - 1 tablespoon chili powder - Seasonings: cumin, smoked paprika, oregano, salt, and pepper These ingredients work together to create a rich and tasty dish. The chicken thighs stay juicy and absorb all the flavors from the spices and tomatoes. The onion and garlic add depth, while the chili powder brings heat. To make your tacos even more special, consider these toppings and sides: - Fresh cilantro, chopped - Lime wedges - Avocado slices - Suggested side dishes: rice, beans, or a fresh salad These toppings add freshness and flavor. Squeezing lime over the tacos brightens the taste. Avocado slices offer creaminess, making each bite a joy. You can customize your meal based on what you enjoy. For the complete details of this delicious dish, check the Full Recipe. Start by placing the chicken thighs in the slow cooker. Spread them out at the bottom. This helps them cook evenly. Next, you need to mix your sauce ingredients. In a bowl, combine the diced onion, minced garlic, diced tomatoes, and tomato sauce. Make sure you keep the tomato juices; they add great flavor. Now, sprinkle the chili powder, cumin, smoked paprika, oregano, salt, and pepper over the chicken. I like to season well for rich taste. Pour that tomato mixture over the chicken, covering it completely. This is where the magic begins! Set your slow cooker to low for 6-8 hours or high for 3-4 hours. This gives you flexibility based on your day. When you’re ready, check if the chicken is tender. You should be able to shred it easily with a fork. Shred the chicken in the slow cooker with two forks. Mix it well with the sauce. This will keep the chicken juicy. Warm the corn tortillas in a skillet over medium heat. Heat them for about 30 seconds on each side. This makes them soft and pliable. Now, serve the shredded chicken mixture on the tortillas. Don’t forget to garnish! Add chopped cilantro and squeeze lime juice over the top. If you love avocado, add slices for extra creaminess. For presentation, I recommend serving the tacos on a large platter. Place lime wedges and a bowl of chopped cilantro on the side. This way, everyone can customize their tacos to their taste. Enjoy your Savory Slow Cooker Chicken Tacos with friends and family! For the full recipe, check out the earlier section. To ensure juicy and tender chicken, always use chicken thighs. They have more fat than breasts, which keeps them moist. Season the chicken well before adding sauce. This step enhances the flavor. When shredding chicken, use two forks. Hold one fork in the shredded chicken, and pull with the other. This method works fast and easy. Shred the chicken right in the slow cooker. It mixes well with the sauce this way. You can adjust spices for your taste. If you like heat, add more chili powder or cumin. For a milder flavor, reduce the spices. Always taste the sauce before serving. Consider adding extra ingredients for a richer flavor. You might add chopped bell peppers or corn. They add sweetness and texture. Fresh lime juice can brighten the dish too. A squeeze just before serving makes the tacos pop. For the full recipe, check the details above for all the ingredients and steps. {{image_2}} You can switch up the protein in this recipe. While chicken is great, consider using beef or pork. Both add different flavors and textures. For a veggie option, try black beans or jackfruit. These alternatives make the dish fun and unique. Just adjust the cooking time based on the protein you choose. Spice things up by mixing in different seasonings. For a kick, add cayenne pepper or chipotle powder. You can also try a dash of salsa or hot sauce for extra zest. Incorporating veggies like bell peppers or corn can add color and crunch. This way, every bite is packed with flavor and nutrients. Tortillas are classic, but you can get creative. Use lettuce wraps for a low-carb option or serve the chicken over rice for a filling bowl. Pair your tacos with sides like black beans or cilantro lime rice. These options enhance your meal and make it even more satisfying. For the full recipe, check out the section above. To keep your leftover chicken tacos fresh, store them in the fridge. Place the tacos in an airtight container. They will last for about 3 to 4 days. If you want to store them longer, you can freeze the chicken mixture. Just let it cool first. Use a freezer-safe bag or container. The tacos will stay good for about 2 to 3 months in the freezer. When it's time to enjoy your leftovers, reheating is key. The best way to warm your chicken tacos is in the microwave. Place the chicken mixture on a microwave-safe plate. Cover it with a damp paper towel. Heat for about 1 to 2 minutes or until hot. For tortillas, warm them in a skillet. Heat over medium for about 30 seconds on each side. This keeps them soft and tasty. You can also use an oven. Wrap the tacos in foil and heat at 350°F for 10 to 15 minutes. Enjoy your meal with fresh toppings! Cooking slow cooker chicken tacos takes about 6 to 8 hours on low heat. If you're in a hurry, you can set it on high for 3 to 4 hours. The chicken should always be very tender when done. This long cooking time helps all the flavors meld together, making a rich and savory dish. Yes, you can use frozen chicken thighs. Just remember to add about an hour to the cooking time. Make sure to check that the chicken reaches a safe temperature of 165°F. Cooking from frozen can still give you great results, but thawing it first might allow for better flavor absorption. Some popular toppings for your tacos include: - Fresh cilantro - Diced onions - Chopped tomatoes - Creamy avocado slices - Shredded cheese - Squeeze of lime You can mix and match these toppings to suit your taste. A squeeze of lime adds a bright flavor, while avocado gives creaminess. Enjoy getting creative with your taco toppings! For the full recipe, click [Full Recipe]. Slow cooker chicken tacos are easy to make and full of flavor. We discussed the main ingredients like chicken thighs, diced tomatoes, and seasonings. I shared how to prepare and cook the chicken, plus tips for tasty toppings. You can mix up the recipe with different proteins and enjoy creative servings. Now you can enjoy delicious tacos any day. Try these tips and experiment with your favorite flavors. Your slow cooker is ready to help you create quick, satisfying meals.

Savory Slow Cooker Chicken Tacos Easy Flavorful Meal

Looking for a simple yet delicious meal? Savory Slow Cooker Chicken Tacos are your answer! This dish combines juicy chicken

To make a delicious cranberry walnut salad, you need fresh and pantry ingredients. Here’s what you will need: - 4 cups mixed greens (arugula, spinach, and kale) - 1 cup dried cranberries - 1 cup walnuts, toasted - 1/2 cup crumbled feta cheese - 1/4 cup red onion, thinly sliced - 1/2 cup apple, diced (preferably a tart variety like Granny Smith) - 1/4 cup balsamic vinaigrette (homemade or store-bought) - Salt and pepper to taste - Fresh herbs for garnish (chopped parsley or cilantro) Using quality ingredients enhances the flavor of the salad. Fresh greens ensure a crisp texture. The dried cranberries add sweetness and a chewy bite. Toasted walnuts provide a nice crunch and rich taste. Each ingredient plays a role in making this salad a fresh and flavorful delight. You can take this salad to the next level with optional add-ins. Here are some ideas: - Avocado: Adds creaminess and healthy fats. - Grilled chicken: Boosts protein and makes it more filling. - Quinoa: Adds texture and extra protein. - Sunflower seeds: Provides a nutty flavor and crunch. Each of these options brings unique nutritional benefits. Avocado is rich in healthy fats. Grilled chicken adds lean protein. Quinoa offers fiber and essential amino acids. Sunflower seeds contain vitamin E and magnesium. Cranberries and walnuts offer many health benefits. - Cranberries: They are full of antioxidants. They can help improve heart health and reduce inflammation. - Walnuts: These nuts are a great source of omega-3 fatty acids. They support brain health and may lower heart disease risk. Mixed greens also contribute to your health. They are low in calories and high in vitamins. Eating mixed greens supports digestion and boosts your immune system. This salad is not just tasty; it’s a great choice for your health! Start by washing the mixed greens. You want them clean and crisp. Rinse them in cold water and spin them dry in a salad spinner. If you don’t have one, pat them dry with a clean towel. This step helps the dressing stick better later. Next, let’s toast the walnuts. This makes them crunchy and enhances their flavor. Heat a dry skillet over medium heat. Add the walnuts and stir often for about 5-7 minutes. You’ll know they are ready when they smell nutty and turn a light golden brown. Once toasted, remove them from the heat and let them cool. Now it’s time to combine everything. In a large salad bowl, add the mixed greens first. This gives a nice base. Next, sprinkle in the dried cranberries, toasted walnuts, crumbled feta cheese, thinly sliced red onion, and diced apple. For the best flavor, add the ingredients in this order. It allows the flavors to mix well. When you toss the salad, be gentle. Use two large spoons to lift and turn the greens. This way, you won’t bruise them. Making the dressing is easy. For a homemade balsamic vinaigrette, mix 1/4 cup balsamic vinegar with 1/2 cup olive oil in a jar. Add a pinch of salt and pepper. Shake well until mixed. When dressing the salad, drizzle the vinaigrette over the top. This helps coat every piece evenly. Toss the salad gently to ensure the greens and toppings are well coated. This step makes each bite full of flavor. For the full recipe, check out the Cranberry Walnut Delight Salad. To make the best Cranberry Walnut Salad, focus on texture and flavor. Here are some pro tips: - Choose fresh greens: Use a mix like arugula, spinach, and kale for variety. - Toast walnuts: This step adds great flavor. Heat them until golden, about 5-7 minutes. - Add sweetness: The dried cranberries bring a nice balance to the salad. Common mistakes can ruin your salad. Avoid these: - Overdressing: Too much dressing can make greens soggy. - Chopping too small: Keep your ingredients in larger pieces for better texture. Cranberry Walnut Salad pairs well with many dishes. Here are my favorites: - Grilled chicken: Its savory taste complements the salad’s sweetness. - Pasta dishes: A light pasta pairs nicely with this fresh salad. For presentation, consider these ideas: - Layer the salad: Use a clear bowl to show off the colorful layers. - Garnish with herbs: Fresh herbs like parsley or cilantro add a pop of color. You can easily adapt this salad for different diets. Here are some ideas: - Vegan option: Skip the feta cheese or use a vegan alternative. - Nut-free option: Replace walnuts with sunflower seeds for crunch. For seasonal variations, try these flavor profiles: - Add citrus: In spring, mix in orange segments for brightness. - Use seasonal fruits: In fall, swap apples for pears for a sweet twist. For the full recipe, check the section above. Enjoy making your salad unique! {{image_2}} You can change up the cranberry walnut salad based on the seasons. Each season brings new fruits and nuts to enjoy. - Winter: Try adding slices of pear and pecans for a cozy feel. - Spring: Fresh strawberries and pistachios bring a bright touch. - Summer: Use blueberries and almonds for a refreshing twist. - Fall: Add roasted sweet potatoes and hazelnuts to enhance the flavor. Using seasonal ingredients makes your salad fresh and exciting. Plus, it supports local farms. Adding protein to your salad makes it more filling and nutritious. Here are some great options: - Chicken: Grilled chicken adds a nice texture and flavor. - Tofu: Marinated tofu is a great plant-based choice. - Chickpeas: Canned or roasted chickpeas give a hearty crunch. - Quinoa: Adding cooked quinoa boosts fiber and protein. These proteins can change the salad's taste and texture. They make every bite satisfying and hearty. While balsamic vinaigrette is classic, you can try other dressings too. Here are some ideas: - Honey mustard: This adds a sweet and tangy kick. - Lemon vinaigrette: A bright, zesty option for a fresh twist. - Ranch dressing: For those who prefer creamy dressings. If you want to make a homemade vinaigrette, here’s a simple recipe: 1. Mix 1 part vinegar (like apple cider or red wine) with 3 parts olive oil. 2. Add a teaspoon of mustard and a pinch of salt and pepper. 3. Shake or whisk until blended. Feel free to get creative with your dressings. Each one can change the salad's flavor and make it a new experience. To keep your Cranberry Walnut Salad fresh, store it properly. First, make sure the salad is cool. Use an airtight container for best results. This helps to keep the ingredients crisp. If you have dressing left, store it separately. This prevents the greens from wilting. Enjoy your salad within three days for optimal taste. You don't need to reheat a salad, but you can refresh it. To bring back its crunch, add a bit of fresh greens. Toss in some new cranberries or walnuts. This will boost the flavor too. If the salad seems soggy, try adding a small amount of fresh dressing. It will bring life back to the mix. Freezing is tricky with salads. I recommend not freezing the whole salad. However, you can freeze the walnuts. Place them in a freezer bag, and remove the air. For thawing, leave them in the fridge overnight. Avoid freezing the greens, cranberries, or cheese. These ingredients do not hold up well. Use them fresh for the best taste. For the full recipe, check out the Cranberry Walnut Delight Salad. If you have nut allergies or dislike walnuts, try sunflower seeds or pumpkin seeds. These options add crunch and flavor. Chopped pecans or almonds can also work well. Each substitute brings its own taste. Use what you love for the best experience. Yes, you can prepare this salad ahead of time. To keep it fresh, store the dressing separately. Combine all the other ingredients in a bowl. Cover it tightly with plastic wrap or a lid. When ready to serve, add the dressing and toss gently. This keeps the greens crisp and tasty. For a flavorful base, mixed greens are great. I recommend using arugula, spinach, and kale. These greens add texture and taste. They're packed with nutrients too. Feel free to mix and match according to your preference. Fresh greens make all the difference in this salad. Cranberry Walnut Salad is a tasty choice. It blends fresh ingredients and healthy options, making it a great dish. Quality matters for the best flavors. You can customize it with add-ins or dressings. Remember, it’s all about balancing flavors, textures, and nutrition. The tips provided will help you avoid mistakes. With these steps, your salad will impress anyone. Enjoy exploring different variations and share them with friends! This salad can fit any season or diet. Now, it's time to enjoy your creation!

Cranberry Walnut Salad Fresh and Flavorful Delight

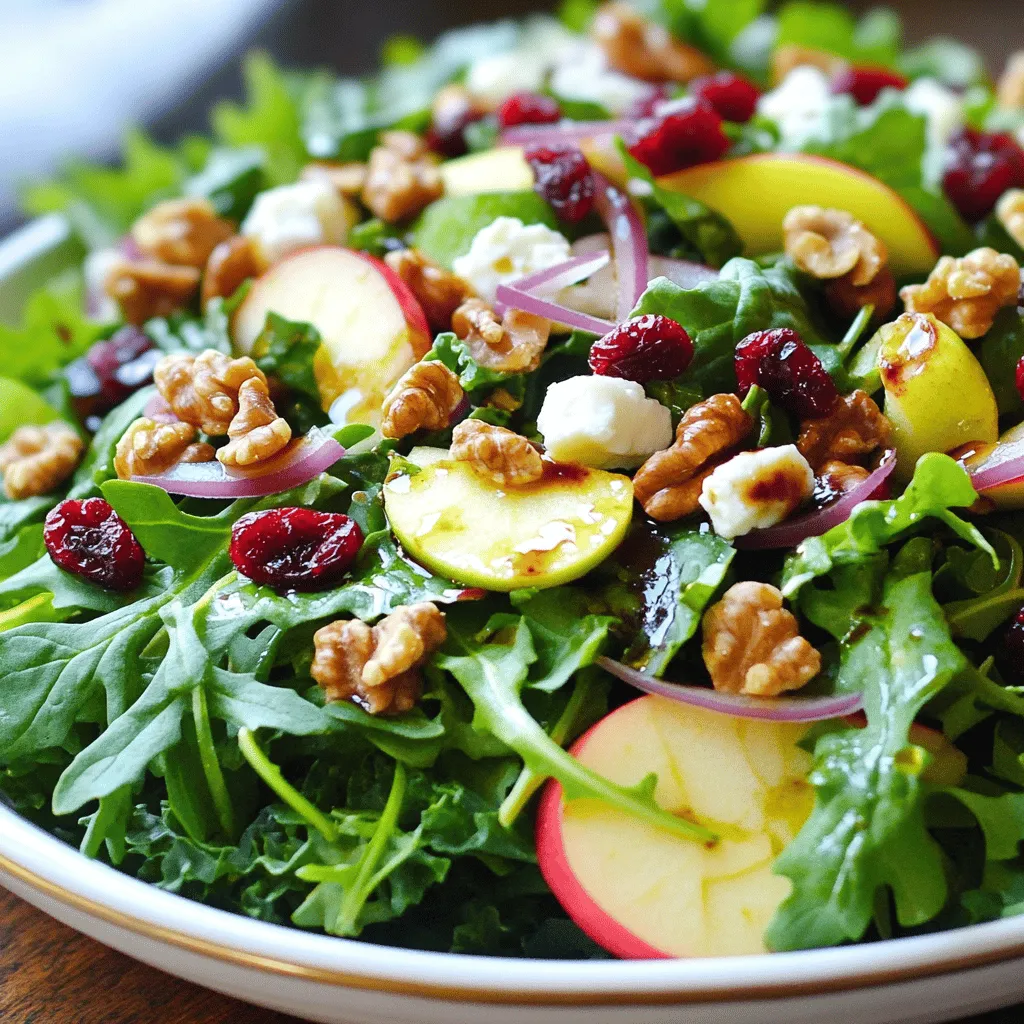
Are you ready to tantalize your taste buds with a fresh and flavorful delight? This Cranberry Walnut Salad is not

- 1 head romaine lettuce, chopped - 1 cup cherry tomatoes, halved - 1 avocado, diced - 1/2 red onion, finely chopped Healthy taco salad starts with fresh, crisp veggies. First, you need romaine lettuce. It adds crunch and freshness. Next, cherry tomatoes give a sweet burst. Diced avocado brings creaminess and healthy fats. Finally, red onion adds a sharp bite. - 1 cup black beans, rinsed and drained - 1 cup cooked quinoa - 1 cup corn kernels (fresh, frozen, or canned) For protein, black beans are a great choice. They add texture and nutrition. Quinoa is a wonderful grain that packs protein too. It makes the salad filling. Then, corn kernels add a sweet crunch. You can use fresh, frozen, or canned. - 1 teaspoon cumin - 1 teaspoon chili powder - 1/2 teaspoon garlic powder - 1/4 cup fresh cilantro, chopped - Juice of 1 lime - Salt and pepper to taste Spices make your taco salad pop! Cumin gives a warm, earthy flavor. Chili powder adds a bit of heat. Garlic powder brings depth. Fresh cilantro brightens the dish. A squeeze of lime juice adds zing. Don't forget salt and pepper to taste. These ingredients come together for a colorful Healthy Taco Salad. If you want the full recipe, check it out [here](#). - First, you need to combine the fresh vegetables. - In a big bowl, add the chopped romaine lettuce. - Next, toss in the halved cherry tomatoes, black beans, corn, diced avocado, and finely chopped red onion. - Make sure everything is mixed well. - Then, you will mix and season the quinoa. - In a small bowl, take the cooked quinoa. - Add cumin, chili powder, garlic powder, lime juice, salt, and pepper. - Stir well until all the spices cover the quinoa. - Now, it is time to toss together the ingredients. - Carefully add the seasoned quinoa to the large bowl with the veggies and beans. - Gently mix everything together, taking care not to mash the avocado. - After mixing, taste the salad. - Adjust seasoning to taste. - You can add more lime juice or salt based on your liking. - Serve the salad in bowls or on a large platter. - Top it with fresh cilantro for a burst of flavor. - Lastly, garnish with crispy tortilla chips for that crunchy touch. Enjoy this colorful healthy taco salad! For the full recipe, check the [Full Recipe]. You can make your taco salad your own in many ways. - Add additional vegetables: Try bell peppers, cucumbers, or corn for more crunch. - Substitute for different proteins: Use grilled chicken, shrimp, or tofu instead of beans. A few tweaks can make your salad even better. - Using homemade dressings: Mix lime juice, olive oil, and a pinch of salt for a fresh dressing. - Adjusting spice levels: Add jalapeños for heat or more cumin for warmth. Make your salad look great. - Layering techniques: Start with lettuce, then add proteins and veggies for a colorful display. - Creative garnishing: Use cilantro, lime wedges, or crushed tortilla chips on top for a fun touch. For the full recipe, check out the detailed instructions to create this delightful dish. {{image_2}} For a vegan taco salad, skip all cheese and dairy. You can enjoy the same great taste without animal products. Use plant-based proteins like lentils or tempeh instead of quinoa. These options add great flavor and keep your salad filling. You can also add nuts or seeds for extra crunch and nutrition. To make a low-carb version, swap quinoa with leafy greens. You can use spinach or kale for a fresh taste. This change lowers carbs while boosting vitamins. For a topping, try fresh salsa instead of heavier dressings. It adds flavor and keeps the dish light and refreshing. Pair your healthy taco salad with tasty sides. Consider serving it with guacamole or black bean dip. These dips add richness and flavor. You can also enjoy the salad with crispy tortilla chips for a nice crunch. This combination makes for a complete and satisfying meal. For more ideas and the full recipe, check out the full recipe. To store your healthy taco salad, place it in the refrigerator. Use an airtight container to keep it fresh. This salad is best eaten within three days. Some ingredients, like avocado, may brown quickly. To slow this down, squeeze lime juice on the avocado before storing. You can freeze some parts of the salad. Black beans and corn freeze well. Cooked quinoa also holds up nicely. Avoid freezing fresh vegetables like lettuce and tomatoes, as they get soggy. To reheat, thaw overnight in the fridge. Then, heat gently in a pan, or microwave until warm. Prepare your salad in advance for quick meals. Chop the vegetables and store them separately from the quinoa and beans. This keeps everything fresh. You can mix them together just before eating. This makes it easy to grab a healthy meal any time. To make a healthy taco salad, start with fresh ingredients. Here’s a step-by-step process: 1. Chop your veggies: Cut 1 head of romaine lettuce into bite-sized pieces. Halve 1 cup of cherry tomatoes. Dice 1 avocado and finely chop 1/2 red onion. 2. Prepare the beans and corn: Rinse and drain 1 cup of black beans. You can use fresh, frozen, or canned corn; measure 1 cup. 3. Cook the quinoa: If you don't have cooked quinoa, prepare 1 cup according to package directions. 4. Mix the spices: In a small bowl, combine the cooked quinoa with 1 teaspoon cumin, 1 teaspoon chili powder, 1/2 teaspoon garlic powder, juice from 1 lime, and salt and pepper. 5. Combine everything: In a large bowl, mix all the chopped veggies, beans, corn, and the seasoned quinoa. Toss gently to keep the avocado intact. 6. Garnish: Serve with fresh cilantro and crispy tortilla chips on top or on the side. This simple method gives you a colorful, nutritious meal! If you want to replace quinoa, there are great options. - Brown rice: This is a filling choice and easy to find. - Farro: It has a nutty taste and chewy texture. - Couscous: This cooks quickly and adds a nice touch. - Lentils: They are packed with protein and fiber. Each of these grains or dals brings a unique flavor and texture to your salad. The salad can last in the fridge for about 3 days. To keep it fresh: - Store in an airtight container: This helps reduce moisture and keeps veggies crisp. - Keep dressing separate: Add dressing just before serving. This helps avoid soggy greens. Check your veggies daily. If they start to look limp, it's best to eat them soon! This blog post detailed how to create a delicious taco salad. We covered fresh vegetables, protein, and spices to enhance flavor. You learned simple prep steps and how to serve it well. Think about customizing your salad with extra veggies or different proteins for a personal touch. Don’t forget the importance of storage for freshness. Enjoy your vibrant salad, knowing it can fit any meal plan. Happy cooking!

Healthy Taco Salad Recipe Simple and Flavorful Dish

Are you ready to enjoy a delicious and healthy meal? My Healthy Taco Salad Recipe is simple yet bursting with

To make Cheesy Spinach Stuffed Chicken, you will need a few key ingredients. Here’s a simple list to help you gather everything: - 4 boneless, skinless chicken breasts - 2 cups fresh spinach, chopped - 1 cup ricotta cheese - 1 cup shredded mozzarella cheese - 1/2 cup grated Parmesan cheese - 2 cloves garlic, minced - 1 teaspoon Italian seasoning - Salt and pepper to taste - 2 tablespoons olive oil - 1 tablespoon lemon juice - Optional: Cherry tomatoes, for garnish Each ingredient plays an important role. The chicken serves as the main protein. Spinach adds a fresh taste and nutrients. The cheeses create that creamy, cheesy filling we all love. Garlic and Italian seasoning boost the flavor, while lemon juice adds brightness. Olive oil is essential for cooking, and cherry tomatoes can make your plate look pretty. You can find the full recipe to guide you through the cooking process. Enjoy making this tasty dish! - Preheat and Sauté Start by preheating your oven to 375°F (190°C). This will help cook the chicken evenly later. Next, heat 2 tablespoons of olive oil in a skillet over medium heat. Add 2 cloves of minced garlic and sauté until you smell the aroma, about 1 minute. Then, throw in 2 cups of chopped spinach. Cook for about 2-3 minutes, just until the spinach wilts. Remove from heat and let it cool a bit. - Mix Cheese and Spinach Filling Grab a medium bowl and combine the sautéed spinach with 1 cup of ricotta cheese, 1 cup of shredded mozzarella cheese, and 1/2 cup of grated Parmesan cheese. Add 1 teaspoon of Italian seasoning, some salt, and pepper to taste. Lastly, squeeze in 1 tablespoon of fresh lemon juice. Mix everything well until you have a nice filling. - Prepare Chicken Breasts Take 4 boneless, skinless chicken breasts. With a sharp knife, make a pocket in each chicken breast by slicing horizontally. Be careful not to cut all the way through. This pocket will hold our cheesy filling. - Stuff and Secure Chicken Now, fill each chicken breast pocket with the cheese and spinach mixture. Make sure it's packed nicely. If the opening doesn't stay shut, use toothpicks to secure it. - Sear Chicken Breasts Heat a bit more olive oil in a large oven-safe skillet over medium-high heat. Place the stuffed chicken breasts in the skillet and sear for about 2-3 minutes on each side. Look for a golden-brown color to show it’s ready to bake. - Bake to Perfection Transfer the skillet to your preheated oven. Let the chicken bake for 20-25 minutes, or until it reaches an internal temperature of 165°F (74°C). This ensures it’s safe to eat and juicy. - Resting and Slicing Chicken Once cooked, remove the skillet from the oven. Let the chicken rest for a few minutes. This helps keep all those tasty juices inside. After resting, slice each chicken breast carefully. - Garnish Suggestions Add a pop of color by garnishing with cherry tomatoes, if you like. They add freshness and make the dish look even better. Enjoy your cheesy spinach stuffed chicken! How to Stuff Chicken Effectively To stuff chicken well, cut a pocket in each breast. Use a sharp knife. Be careful not to cut through the other side. This pocket holds all the tasty filling. When you stuff it, pack the filling in tight. This keeps it from spilling out while cooking. Using toothpicks helps keep the chicken closed, too. Ensuring Chicken is Moist To keep chicken juicy, do not overcook it. The ideal temperature is 165°F (74°C). Searing the chicken first adds flavor and seals in moisture. Adding olive oil while cooking helps, too. Let the stuffed chicken rest after cooking. This allows the juices to settle back in. Suggested Seasonings and Spices Italian seasoning adds a nice touch. You can also use garlic powder for extra flavor. A pinch of red pepper flakes gives some heat. Feel free to mix in fresh herbs like basil or parsley. These will brighten the dish. Pairing Options for Cheese Mozzarella is mild and melts well. Ricotta adds creaminess, making the filling rich. Parmesan gives a sharp taste. You can try other cheeses, like feta or gouda, for unique flavors. Each cheese brings something special to the dish. Plating Suggestions When you plate your chicken, slice it to show the filling. This makes it look appealing. Use a large white plate for contrast. Place the chicken at an angle for a nice touch. Adding Color with Garnishes Cherry tomatoes add vibrant color to the dish. Scatter them around the chicken. Fresh herbs like parsley or basil also add a pop of green. This makes your meal look fresh and inviting. {{image_2}} You can mix up the cheeses in this recipe. Try using cream cheese for a richer taste. Goat cheese adds a tangy flavor. You can also use cheddar for a sharper taste. Feel free to add other veggies too. Bell peppers or mushrooms blend well with spinach. They give extra texture and flavor. If you want a quick dinner, use an air fryer. Cook the stuffed chicken at 360°F for about 18-20 minutes. This gives you a crispy outside and juicy inside. Grilling is another fun option. Grill the chicken for about 6-8 minutes on each side. This will give your dish a nice smoky flavor. For a gluten-free meal, just skip breading. The recipe is already gluten-free as is. If you need it dairy-free, swap cheeses with nut-based options. Vegan cream cheese works great. You can also use tofu blended with spices as a filling. These swaps keep the dish tasty while meeting dietary needs. Refrigerator Storage You can keep leftover Cheesy Spinach Stuffed Chicken in the fridge. Place it in an airtight container. It stays fresh for up to three days. Make sure it's cooled before sealing it. This helps keep the moisture in. Freezing Instructions If you want to store it longer, freezing is a great option. Wrap each stuffed chicken breast tightly in plastic wrap. Then, place them in a freezer-safe bag. They can last up to three months in the freezer. Just label the bag with the date. Best Methods to Reheat The best way to reheat stuffed chicken is in the oven. Preheat the oven to 350°F (175°C). Place your chicken in a baking dish and cover it with foil. Heat for about 20 minutes or until warmed through. You can also use a microwave, but it may not keep the texture as well. Tips for Maintaining Texture To keep the chicken juicy, add a splash of broth to the dish before reheating. This extra moisture helps to prevent drying. Avoid reheating it multiple times. Each time you heat it, the chicken loses more moisture. Enjoy your meal just as delicious as the first time! How long does it take to cook stuffed chicken? It takes about 50 minutes to cook Cheesy Spinach Stuffed Chicken. This includes 20 minutes of prep and 25 minutes of baking. Can I prep the chicken ahead of time? Yes, you can prep the chicken a day before. Stuff and cover it, then store it in the fridge. What to serve with Cheesy Spinach Stuffed Chicken? I love serving it with a fresh salad or roasted veggies. You can also pair it with rice or pasta. Can I use frozen spinach? You can use frozen spinach, but thaw and drain it first. It helps avoid soggy filling. Is this recipe suitable for meal prep? Yes! This dish is great for meal prep. You can store it in airtight containers for easy meals. What to do if the chicken is dry? If the chicken is dry, it may have overcooked. Always use a meat thermometer to check for 165°F. How to tell when the chicken is cooked through? Check the thickest part of the chicken. It should reach 165°F for safe eating. The juices should run clear, too. This post covered all you need to make Cheesy Spinach Stuffed Chicken. You learned about the key ingredients and followed clear steps for prep and cooking. Tips and tricks helped enhance flavor and presentation, while variations offered fun options. Don’t forget to store leftovers well to keep them tasty. Remember, cooking is about creativity and enjoyment. Try new flavors and share your results! Happy cooking!

Cheesy Spinach Stuffed Chicken Tasty and Simple Meal

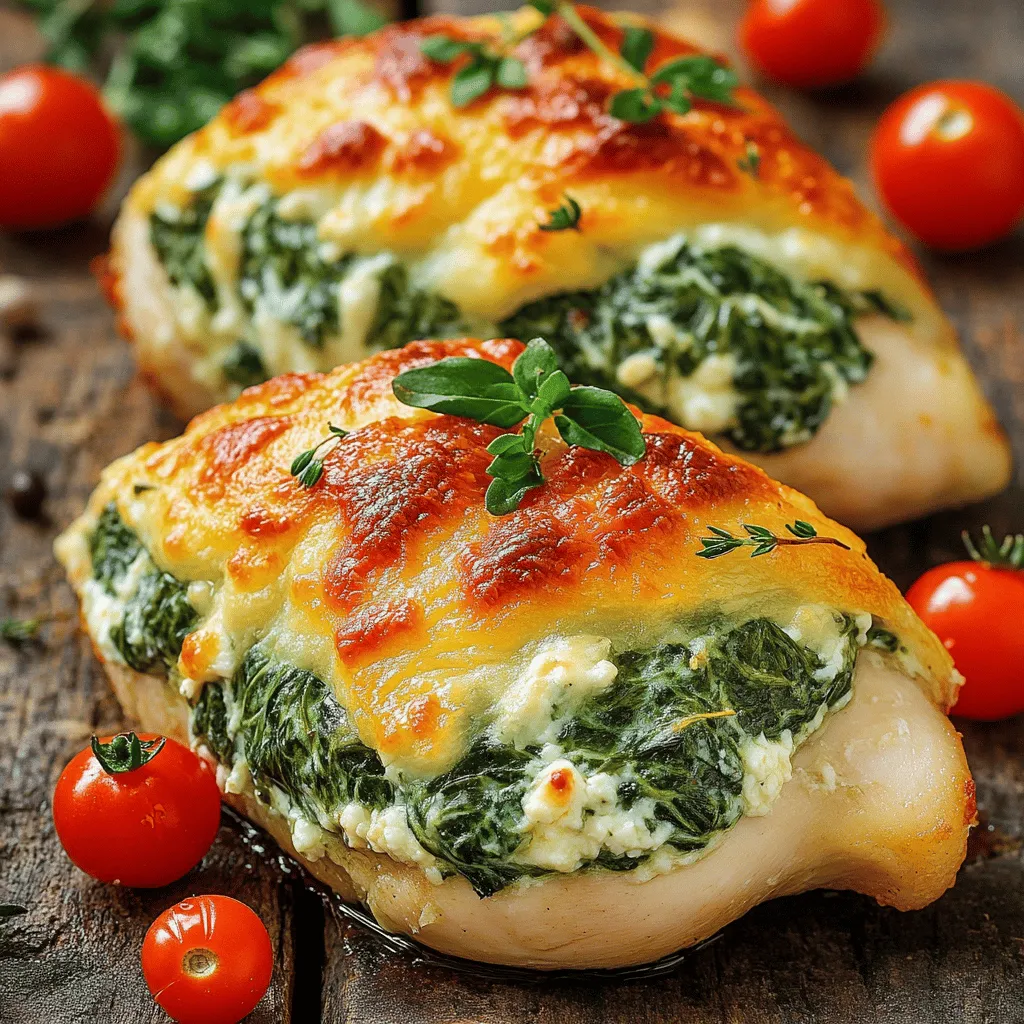
Looking for a tasty and easy meal? Cheesy Spinach Stuffed Chicken is your answer! This dish combines juicy chicken breasts

- 1 medium head of cauliflower, cut into florets - 4 cloves of garlic, minced - 1/2 cup grated Parmesan cheese - 1/4 cup olive oil - 1 teaspoon garlic powder - 1 teaspoon onion powder - 1 teaspoon dried oregano - 1/2 teaspoon red pepper flakes (optional) - Salt and pepper to taste - Fresh parsley, chopped (for garnish) The ingredients for Garlic Parmesan Roasted Cauliflower are simple but powerful. Cauliflower acts as a great base. The garlic gives it a strong flavor. Parmesan cheese adds a rich, savory touch. Olive oil helps everything roast nicely. This dish is not only tasty but also healthy. Cauliflower is low in calories and high in fiber. The garlic may boost your immune system. Parmesan adds protein and calcium. It’s a great side dish for any meal. You can change some ingredients based on your taste. Use nutritional yeast instead of Parmesan for a vegan option. For a spicy kick, add more red pepper flakes. If you don’t have fresh garlic, garlic powder works too. 1. Preheating the oven Start by preheating your oven to 425°F (220°C). This high heat helps the cauliflower get crispy and brown. 2. Preparing the garlic mixture In a large bowl, mix together: - 1/4 cup olive oil - 4 cloves of minced garlic - 1 teaspoon garlic powder - 1 teaspoon onion powder - 1 teaspoon dried oregano - 1/2 teaspoon red pepper flakes (optional) - Salt and pepper to taste Whisk these ingredients until they blend well. This mixture will give the cauliflower a rich flavor. 1. Tossing the florets Add your cauliflower florets to the bowl. Toss them well in the garlic mixture. Make sure each floret gets coated evenly. 2. Baking and stirring Spread the coated florets on a baking sheet lined with parchment paper. Bake for 20-25 minutes. Stir halfway through to ensure even cooking. The cauliflower should be tender and golden brown when done. 1. Sprinkling cheese Once the cauliflower is roasted, take it out of the oven. Sprinkle 1/2 cup of grated Parmesan cheese over the florets. This adds a nice cheesy flavor. 2. Garnish before serving Put the baking sheet back in the oven for another 5 minutes. This helps the cheese melt and crisp up. After that, take it out and let it cool a bit. Garnish with fresh parsley before serving. This step-by-step guide makes it easy to create Garlic Parmesan Roasted Cauliflower. For the Full Recipe, refer to the ingredients section. To get the best roast, set your oven to 425°F (220°C). This hot temperature helps the cauliflower brown nicely. I always use parchment paper on the baking sheet. It prevents sticking and makes cleanup a breeze. Want to change things up? Try adding smoked paprika or lemon zest for a kick. You could also use different cheeses. Try feta or nutritional yeast for a dairy-free option. Garlic Parmesan roasted cauliflower pairs well with many dishes. Serve it alongside grilled chicken or fish for a full meal. It also works great as a side for pasta or quinoa dishes. You can even toss it into salads for added crunch. {{image_2}} You can change the flavor of Garlic Parmesan Roasted Cauliflower easily. Try different spice blends to kick up the heat. A dash of cumin or smoked paprika adds depth. If you like it spicy, increase the red pepper flakes. You can also switch out the herbs. Instead of oregano, use thyme or rosemary for a fresh twist. Mixing fresh herbs like basil or cilantro can give your dish a bright flavor. Each herb brings its own flair to the dish. If you want a healthier choice, try air frying the cauliflower. It cooks quickly and makes the florets crispy without much oil. Set your air fryer to 400°F (200°C) and cook for about 15-20 minutes. Shake the basket halfway for even cooking. Grilling is another fun option. Toss the cauliflower in the garlic mix, then place it on skewers. Grill over medium heat for about 10-15 minutes. The smoky flavor will add a delightful twist. Serving Garlic Parmesan Roasted Cauliflower as a salad topping is a great way to add crunch. It pairs well with greens, nuts, and a light dressing. You can also mix it with other roasted vegetables. Carrots, bell peppers, or zucchini add color and taste. This combination makes a colorful dish that is both tasty and healthy. For the full recipe, check the recipe section above! To keep your Garlic Parmesan roasted cauliflower fresh, start by cooling it. Place the leftovers in an airtight container. This helps lock in flavor and moisture. Store the container in your fridge. It will last up to four days. If you want to save it for longer, freezing is a good option. First, let the cauliflower cool completely. Then, spread it on a baking sheet in a single layer. Freeze it for a few hours until solid. After that, transfer it to a freezer-safe bag or container. It can last up to three months in the freezer. When it's time to enjoy your leftovers, you can use the oven or microwave. I recommend using the oven for the best texture. Preheat it to 350°F (175°C). Spread the cauliflower on a baking sheet and heat for about 10-15 minutes. This keeps the cauliflower crispy. If you’re in a hurry, the microwave works too. Place the cauliflower in a microwave-safe dish and cover it. Heat on high for 1-2 minutes. Stir halfway through to ensure even warming. However, this method may make the cauliflower a bit softer. Enjoy your tasty side dish! For the full recipe, check out the details above. Cutting cauliflower into florets is easy. Start by removing the leaves from the head. Place the cauliflower on a cutting board. Cut the stem away, then break it into smaller sections with your hands. Use a knife to cut these sections into bite-sized florets. This method keeps the pieces even and helps them cook well. Yes, you can use frozen cauliflower. It is convenient and saves prep time. Keep in mind that frozen cauliflower has more water. This may affect the roasting process. To get a good texture, thaw and drain it first. Pat it dry with a paper towel before seasoning. To make this dish vegan, you can replace Parmesan cheese with a plant-based option. Nutritional yeast is a great choice. It adds a cheesy flavor without dairy. You can also try using vegan cheese shreds if you prefer. The garlic and spices will still shine through. Garlic Parmesan Roasted Cauliflower can last in the fridge for about 3 to 5 days. Store it in an airtight container to keep it fresh. When you’re ready to eat, just reheat it in the oven or microwave. This will help maintain its flavor and texture. You can find the Full Recipe for Garlic Parmesan Roasted Cauliflower earlier in this article. It has all the steps and ingredients you need to make this tasty side dish. Enjoy cooking! This blog covers making Garlic Parmesan Roasted Cauliflower easily. You learned about the key ingredients, cooking steps, and flavor tips. I shared storage advice and various serving ideas. You can customize this dish with spices and herbs, making it your own. Enjoy experimenting with this tasty recipe. It’s simple and satisfying. Happy cooking!

Garlic Parmesan Roasted Cauliflower Tasty Side Dish

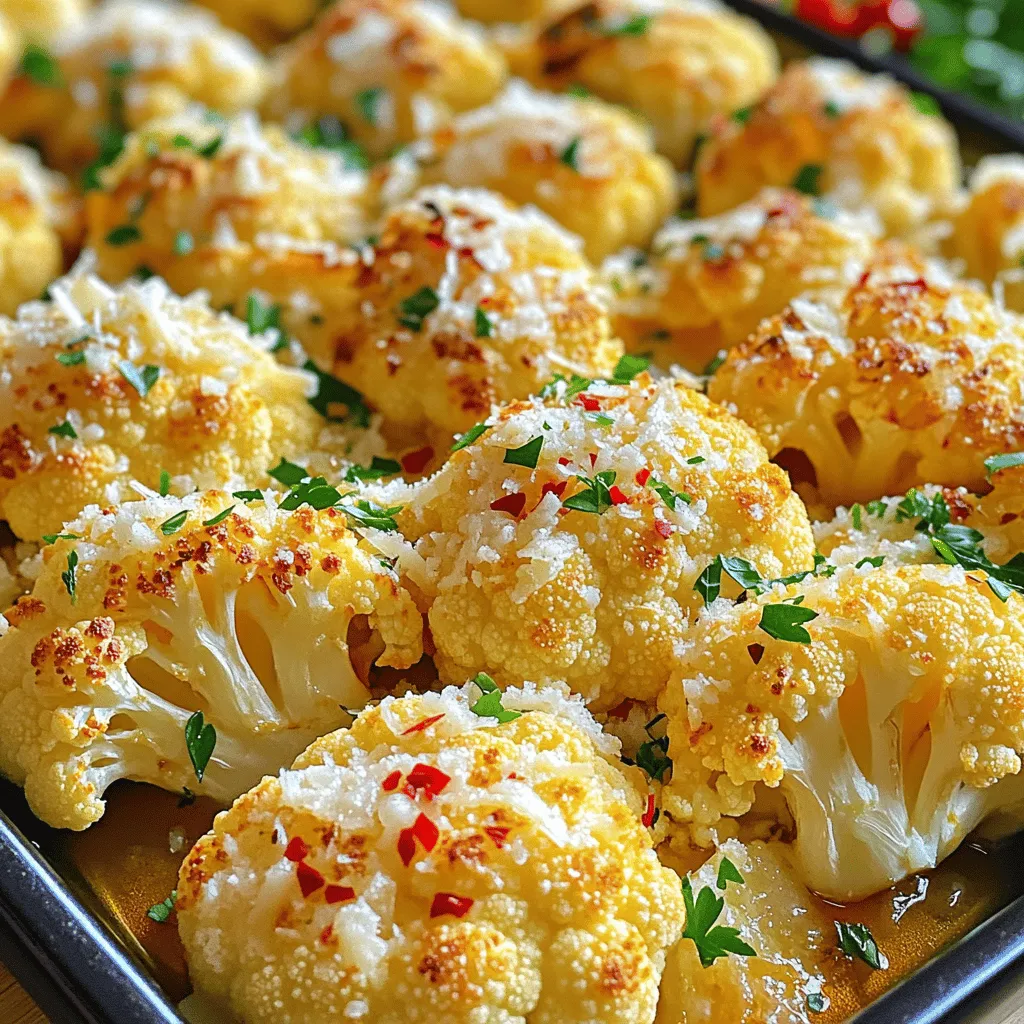
If you’re searching for an easy and delicious side dish, you’ve come to the right place! Garlic Parmesan Roasted Cauliflower

To make a warm bowl of apple cinnamon oatmeal, gather these simple ingredients: - 1 cup rolled oats - 2 cups almond milk (or any milk of your choice) - 1 medium apple, peeled, cored, and diced - 1 teaspoon ground cinnamon - 1 tablespoon maple syrup (or honey) - 1/4 cup walnuts, chopped (optional) - A pinch of salt - Fresh apple slices and a sprinkle of cinnamon for garnish Each ingredient plays a part in creating a delicious experience. The rolled oats give a hearty base. Almond milk makes it creamy, while the diced apple adds sweetness and texture. Cinnamon brings warmth and flavor. Maple syrup or honey adds a touch of natural sweetness. Walnuts give a nice crunch, but they’re optional. Salt enhances all the flavors. For a pretty finish, use fresh apple slices and a dusting of cinnamon on top. This recipe is not only easy but also healthy. You can enjoy it for breakfast or as a snack. You can find the full recipe [here]. - Combine oats, milk, diced apple, cinnamon, and salt in a saucepan. - Bring to gentle boil over medium heat. Start with a medium saucepan. First, add 1 cup of rolled oats. Pour in 2 cups of almond milk or milk you prefer. Next, add 1 peeled and diced apple, 1 teaspoon of ground cinnamon, and a pinch of salt. Stir the mixture well. It should blend nicely. Heat the pan on medium until it begins to bubble. - Reduce heat and simmer for 5-7 minutes. - Stir occasionally until oats are cooked. Once the mixture boils, turn the heat down low. This step is very important. You want it to simmer gently. Let it cook for 5 to 7 minutes. Stir it from time to time. This helps the oats cook evenly. You know it is ready when the oats are tender and the mix is thick. - Stir in maple syrup and walnuts. - Serve with garnishes. After cooking, take the pan off the heat. Now, add 1 tablespoon of maple syrup. If you like walnuts, mix in 1/4 cup of chopped walnuts for a nice crunch. Then, serve the oatmeal warm in bowls. Garnish with fresh apple slices and a sprinkle of cinnamon. This makes it look and taste great. For the full recipe, check the recipe section above. To get the best texture in your apple cinnamon oatmeal, choose rolled oats. They cook well and give a nice chewy feel. If you prefer a thicker oatmeal, cook it a bit longer. For creamier oatmeal, reduce the cooking time. This gives you more liquid and a softer bite. You can make your oatmeal even tastier by adding spices. Nutmeg gives a warm kick, while vanilla adds a sweet note. A splash of vanilla extract can brighten the dish. You can mix it in while cooking or add it before serving for a fresh boost. Pair your oatmeal with yogurt for extra creaminess. Fresh fruit, like berries or bananas, adds great flavor and color. For a crunchy twist, top with chopped nuts or seeds. A drizzle of honey or maple syrup can also enhance the sweetness. Enjoy your oatmeal warm for a comforting start to your day! For the full recipe, check out the Apple Cinnamon Oatmeal section above. {{image_2}} You can make this apple cinnamon oatmeal lighter. Start by using low-calorie sweeteners. Options like stevia or monk fruit keep the sweetness. You can also swap almond milk with coconut or oat milk. These choices offer different flavors and nutrients. Want to jazz it up? Add dried fruits like raisins or cranberries for extra sweetness. They bring a chewy texture that contrasts well with the oatmeal. You can also stir in nut butters, like almond or peanut. They add creaminess and protein, making each bite more satisfying. If you need gluten-free options, choose certified oats. They ensure no cross-contamination with gluten. For vegan adjustments, use maple syrup instead of honey. This keeps the recipe plant-based while still being delicious. Store your leftover apple cinnamon oatmeal in an airtight container. This keeps it fresh. Place it in the fridge. It lasts about three to five days. The oatmeal may thicken as it sits. You can add a bit of milk when you reheat it to loosen it up. To reheat oatmeal, the best method is the microwave. Heat it in short bursts. Stir it every 30 seconds to ensure even heating. You can also use a saucepan on low heat. If it seems dry, add a splash of almond milk. To enhance the flavor, add a dash of cinnamon or a drizzle of maple syrup. You can freeze apple cinnamon oatmeal for longer storage. Allow it to cool completely first. Then, portion it into freezer-safe bags or containers. Label them with the date. When you’re ready to eat, thaw it overnight in the fridge. You can also cook it from frozen. Just add a little extra milk and heat it slowly on the stove. Enjoy your warm, comforting breakfast anytime! To make this oatmeal vegan, you can easily swap out the milk. Use almond milk or coconut milk instead of dairy milk. For sweetening, replace honey with maple syrup. Both options keep the dish tasty and plant-based. Yes, you can prepare overnight oats! Combine the oats, almond milk, diced apple, and cinnamon in a jar. Stir well, cover, and refrigerate overnight. In the morning, just stir and enjoy it cold or warm it up in the microwave. Apple cinnamon oatmeal is packed with nutrients. Here’s what you get: - Oats: They provide fiber, which helps digestion. - Apples: They add vitamins, like Vitamin C, and antioxidants. - Cinnamon: This spice can help lower blood sugar levels. - Walnuts: If you add them, they give healthy fats and protein. Together, these ingredients create a balanced and nourishing meal. Absolutely! You can prepare a big batch for the week. Cook the oatmeal as usual and divide it into containers. Store them in the fridge. Reheat a portion each morning. This makes breakfast quick and healthy! You can also try adding different toppings each day to keep it fresh. Apple cinnamon oatmeal is simple and tasty. We covered key ingredients and step-by-step cooking tips. You learned how to add flavors and make variations that fit your diet. Storing and reheating the oatmeal was also discussed. Now, you can enjoy a warm, healthy breakfast anytime. With these methods, making oatmeal is easy and fun. Try it out, share your favorites, and inspire others to enjoy this delicious dish!

Apple Cinnamon Oatmeal Comforting and Healthy Recipe

Are you ready to enjoy a warm, cozy bowl of Apple Cinnamon Oatmeal? This dish isn’t just comforting; it packs

To make a tasty Pesto Chicken Pasta Bake, you need some simple ingredients. Here’s what you will need: - 300g penne pasta - 2 cups cooked chicken, shredded - 1 cup basil pesto - 1 cup cherry tomatoes, halved - 1 cup mozzarella cheese, shredded - 1/2 cup Parmesan cheese, grated - 1/4 cup sun-dried tomatoes, chopped - 2 cloves garlic, minced - 1 tablespoon olive oil - Salt and pepper to taste - Fresh basil leaves for garnish These ingredients create a warm and comforting dish. The penne pasta holds the sauce well, while the chicken adds protein. The pesto brings a fresh flavor. Cherry tomatoes add a burst of sweetness. Mozzarella and Parmesan give that cheesy goodness everyone loves. When you choose your ingredients, pick fresh items. Fresh basil makes a big difference. If you can, use homemade pesto for the best taste. The combination of flavors will blow you away. It’s a dish you’ll want to share with family and friends. For the full recipe, check the details above. Enjoy your cooking! - Preheat the oven to 180°C (350°F). - Boil the penne pasta in salted water until al dente. This takes about 8-10 minutes. Drain the pasta and set it aside. - In a large bowl, mix the shredded chicken with basil pesto, minced garlic, cherry tomatoes, and sun-dried tomatoes. Make sure everything is well coated. - Add the cooked penne pasta to the chicken mixture. Gently mix everything together. - Season with salt and pepper to taste. This helps bring out the flavors. - Transfer the pasta mixture into a greased baking dish. Spread it out so it cooks evenly. - Top the dish with shredded mozzarella and grated Parmesan cheese. This will create a nice, cheesy crust. - Drizzle olive oil over the top to add moisture and flavor. - Bake in the preheated oven for about 25-30 minutes. Look for the cheese to be bubbly and golden brown. - Once done, let it cool for a few minutes. Garnish with fresh basil leaves for a pop of color. Enjoy your Pesto Chicken Pasta Bake! For more details, refer to the Full Recipe. To make the best Pesto Chicken Pasta Bake, cook your pasta al dente. This means it should be firm to the bite but not hard. Al dente pasta holds its shape well during baking. This keeps your dish from becoming mushy. When it comes to cheese, choose a mix for optimal melting. Mozzarella adds stretch and creaminess. Parmesan brings a nice sharp flavor. Together, they create a delightful topping that will melt beautifully. Using rotisserie chicken can save you time. It’s already cooked and full of flavor. Just shred it and mix it into your dish. This makes dinner quick and easy. For busy schedules, consider meal prep. You can cook the pasta and mix the ingredients ahead of time. Store them in the fridge until you are ready to bake. This way, you can enjoy a homemade meal even on busy nights. You can enhance your bake with spices or herbs. Try adding a pinch of red pepper flakes for heat. Fresh herbs like thyme or oregano can elevate the taste. Don’t forget about variations in pesto. You can use different types, like sun-dried tomato or spinach pesto. Each type adds a unique twist to your dish. Experiment and find your favorite flavor! For the complete recipe, check out the [Full Recipe]. {{image_2}} You can swap chicken for turkey or tofu easily. Turkey has a similar taste and works great. Tofu adds a nice texture and makes the dish vegetarian. Make sure to press the tofu to remove extra water. Then, cube it and sauté before mixing it into the pasta. This way, you get a tasty and satisfying meal without meat. Using different pasta can change the whole dish. Fusilli's twists catch the sauce well, while rigatoni has deep grooves that hold onto flavors. If you need gluten-free options, try brown rice or chickpea pasta. These choices keep the dish yummy and help more people enjoy it. Don’t be afraid to get creative with sauces. You can use Alfredo, marinara, or even a creamy mushroom sauce. Each adds a new layer of flavor. You might also want to add veggies like spinach, bell peppers, or zucchini to boost nutrition. These additions not only make it healthier but also add colors and textures. For the full recipe, check the original section on Ingredients. After you enjoy your pesto chicken pasta bake, store the leftovers right. Let the dish cool down first. Then, place it in an airtight container. This keeps the flavors fresh. I recommend using glass or BPA-free plastic containers. They are great for keeping your food safe and tasty. If you want to save some for later, freezing works well. Portion out the pasta bake into smaller containers. This makes it easy to grab just what you need. Make sure to wrap each container tightly with plastic wrap before you freeze them. When you're ready to eat, thaw it in the fridge overnight. To reheat, place it in the oven at 180°C (350°F) until it's warm. This usually takes about 20-25 minutes. In the fridge, your pesto chicken pasta bake lasts about 3 to 4 days. Always check for signs of spoilage. If you see mold or smell anything off, it’s best to throw it away. Trust your senses; they are usually right! Yes, you can prepare this dish ahead. Just follow the steps until you bake it. Store the uncooked pasta bake in the fridge for up to 24 hours. When ready to bake, just add a few extra minutes to the cooking time. If you don't have basil pesto, try sun-dried tomato pesto or garlic pesto. You can also make homemade pesto using spinach or arugula. Each option brings a unique twist to the dish. Check for bubbling cheese and a golden top. You can also insert a knife in the middle. If it comes out hot, the dish is ready. Let it cool slightly before serving for the best flavor. Absolutely! Feel free to add vegetables like bell peppers, zucchini, or spinach. Just make sure to chop them small. This adds color and nutrients to your pasta bake. Yes, this pasta bake freezes well. Just let it cool completely before packing it in an airtight container. It can last for up to three months. To reheat, bake from frozen at 180°C (350°F) until hot throughout. This blog covered a tasty pasta bake recipe that’s easy to make. We discussed the key ingredients, clear step-by-step instructions, and useful tips for perfecting your dish. Remember, you can switch up proteins, try different pasta, or add fresh veggies for variety. Storing leftovers properly ensures you enjoy every bite. This recipe is flexible and dependable, making it great for busy days. Feel free to experiment and make it your own. Enjoy your cooking adventure!

Pesto Chicken Pasta Bake Flavorful and Comforting Dish

Looking for a warm, hearty meal? This Pesto Chicken Pasta Bake is your answer! With tender pasta, juicy chicken, and

Older posts
Newer posts
← Previous Page1 … Page3 Page4 Page5 Page6 Next →

dsad

© 2025 mealmaple • Built with GeneratePress

Our Policies

  • Copyright Policy
  • Cookie Policy
  • GDPR Policy
  • Privacy Policy
  • Disclaimer
  • Terms Of Use

More Information

  • Home
  • About
  • Contact
  • Appetizers
  • Dessert
  • Dinner
  • Drinks
©2025, mealmaple About Back To Top